Welcome to Week 6 of the Monster Feet Yarn Bomb Along!
Woo hoo, we made it! The last week of the Monster Feet Yarn Bomb Along is finally here … so how’s the installation going?
This week we have some installation tips and we’re also sharing a selection of your amazing monster feet yarn bombs. We’re so impressed with all of your great work!
Remember, just because it’s the last week of this yarn bomb along, you can always join in anytime, forever more.All the resources will remain on the web! Each week is listed at the top and bottom of each post for quick reference.
Installation Tips
Here are six tips to get you through this week’s big install:
Bring tools! At minimum you’ll definitely need extra yarn for sewing and securing your yarn bomb, a tapestry needle, and scissors. Depending on where you plan to install your monster feet, other tools you might need include: a stapler, cable ties, wire, elastics, a flashlight, sunscreen, a step ladder, and/or a crochet hook.
Some people sew their yarn bombs to install them, while others use cable ties or both – you can decide what’s best, depending on the structure you’re attaching to. Think about things like rain (water can weigh the yarn down), accessibility (will it be touched a lot?), etc, when deciding which method to use.
Tag your piece … but this is 100% optional … many yarn bombers like to tag their work so people know who made it. The decision to remain anonymous or shout it out to the world is completely up to you!
Invite a friend! Yarn bombing is more fun when done in groups … plus you may need an extra pair of hands, and you’ll definitely want someone to document the fun … which brings us to the next tip …
Take pics, share them on the interwebs and remember to use hashtag #MFYBAL!
Lastly, HAVE FUN!
Your Magical Monster Feet
We trolled Twitter and Instagram to put together this selection of your wonderful monster feet yarn bombs. Click on the picture to be taken to the maker’s post.
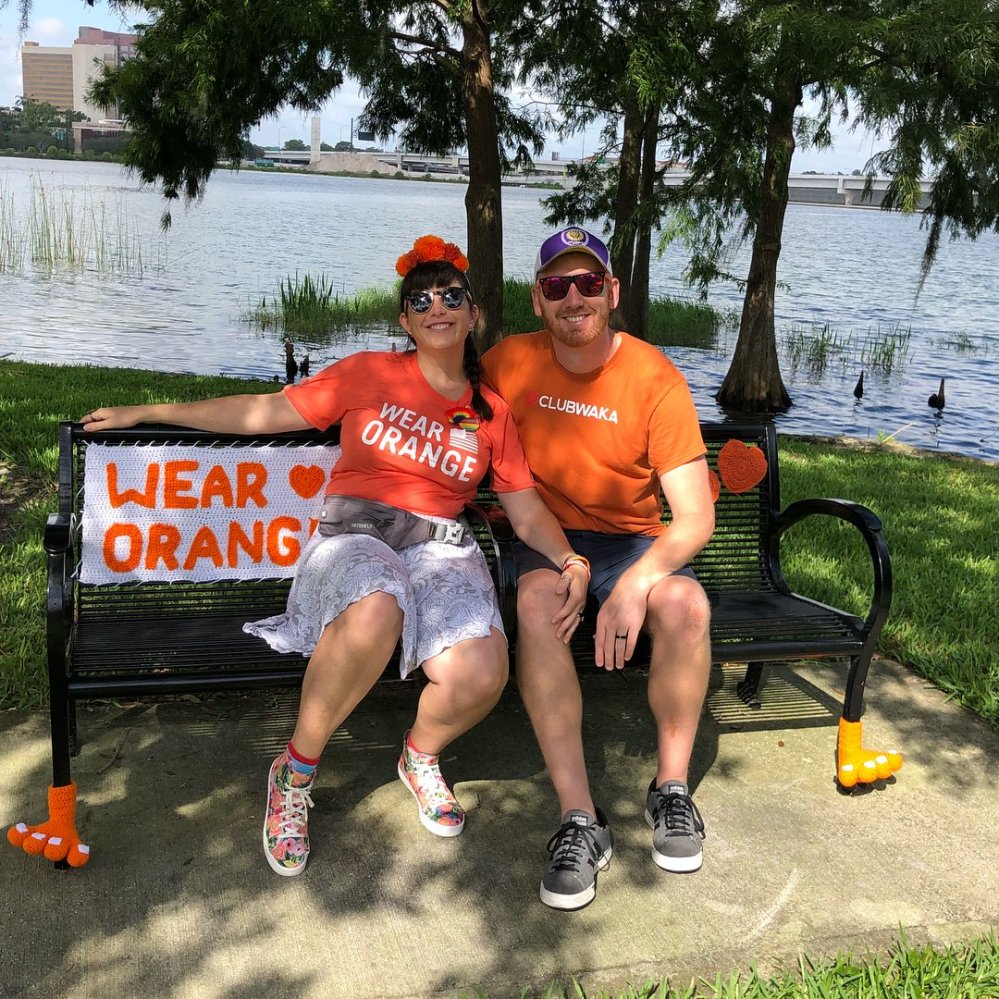
Monster Feet Yarn Bomb By Hi, Jenny Brown
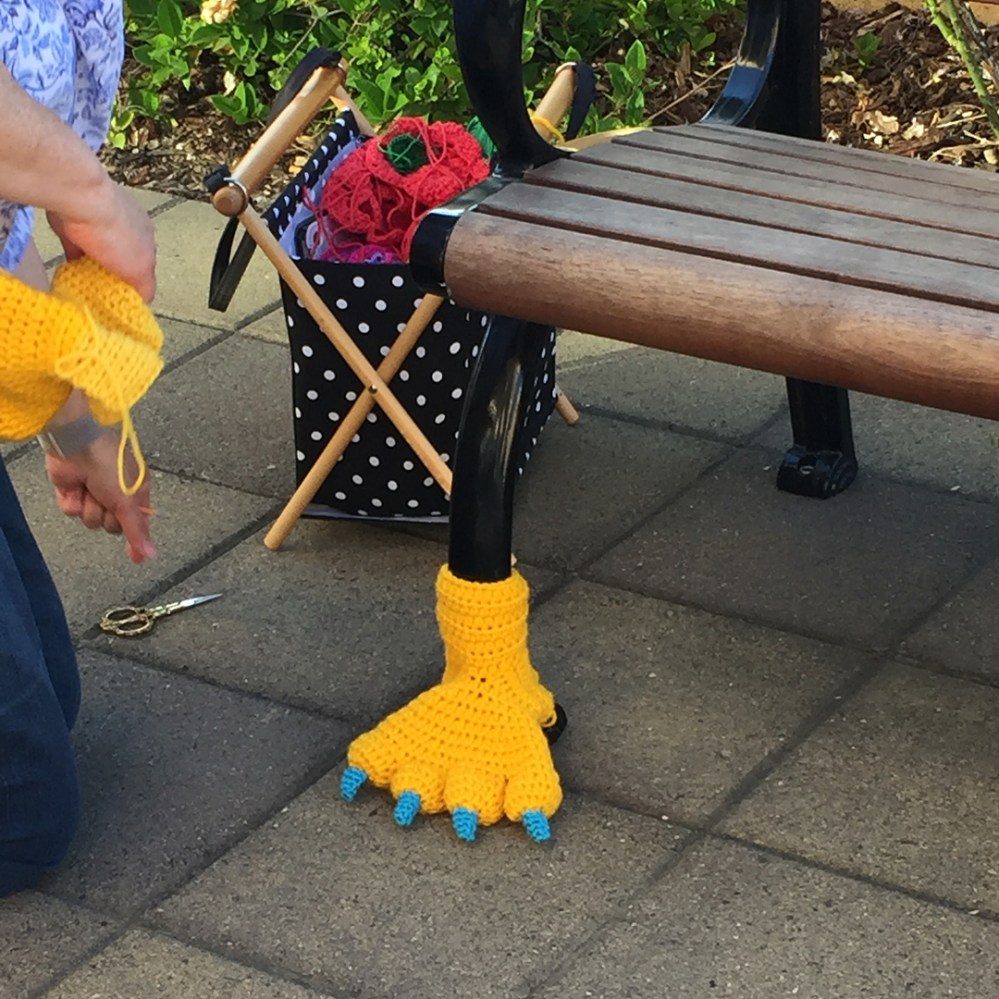
Monster Feet Yarn Bomb By Threadwinners
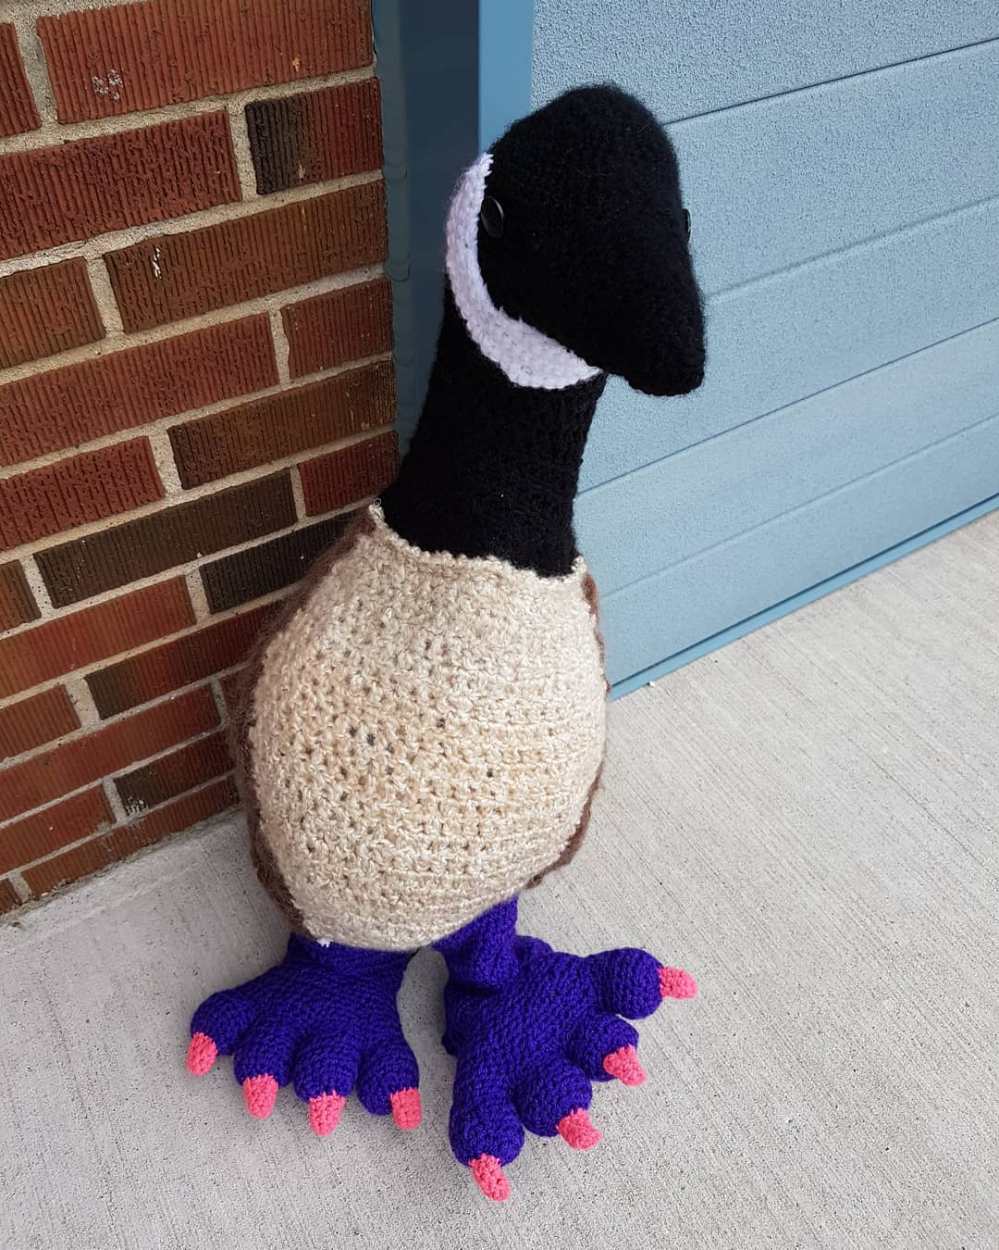
Monster Feet Yarn Bomb By YarnGardenerMonster Feet Yarn Bomb By LizzieKnittingMonster Feet Yarn Bomb By BarryMonster Feet Yarn Bomb By BarryMonster Feet Yarn Bomb By SusanMonster Feet Yarn Bomb By GuerrillaKnitterMonster Feet Yarn Bomb By Jodie MatteMonster Feet Yarn Bomb By KnithackerMonster Feet Yarn BoMonster Feet Yarn Bomb By NaomiRagMonster Feet Yarn Bomb By AlexCreatesMonster Feet Yarn Bomb By Mary Hall Paz
Want more? Check out the #MFYBAL hashtag on Instagram here and on Twitter here.
BIG THANKS to everyone who participated in the very first Knits For Life Monster Feet Yarn Bomb Along!
Welcome to Week 5 of the Monster Feet Yarn Bomb Along!
It’s the home stretch! This week we crochet the optional claws or toenails. If you’re making the bare version, you get a week off. Next week we’ll install our monster feet!
Remember, it’s never too late to join in! Go at your own pace, fast or slow.All the resources will remain on the web! Each week is listed at the top and bottom of each post for quick reference.
We’re going live
In lieu of our usual silly video tutorial this week, we are going live! We’ll hook up a claw and a toenail and discuss what’s been happening in the forum. This is a great chance to ask questions and get our feedback before installing next week. Or maybe you’ve jumped ahead and want to share how it went. Chat at us in the live video!
To tune in, hop over to our Instagram or our Facebook page at noon Pacific time on Sunday, June 3. Look for our “Story”. You’ll see options to comment during the broadcast. We’ll all see a live stream of your comments that we can chat about. Don’t worry if you miss it. After we go live we’ll post the video here.
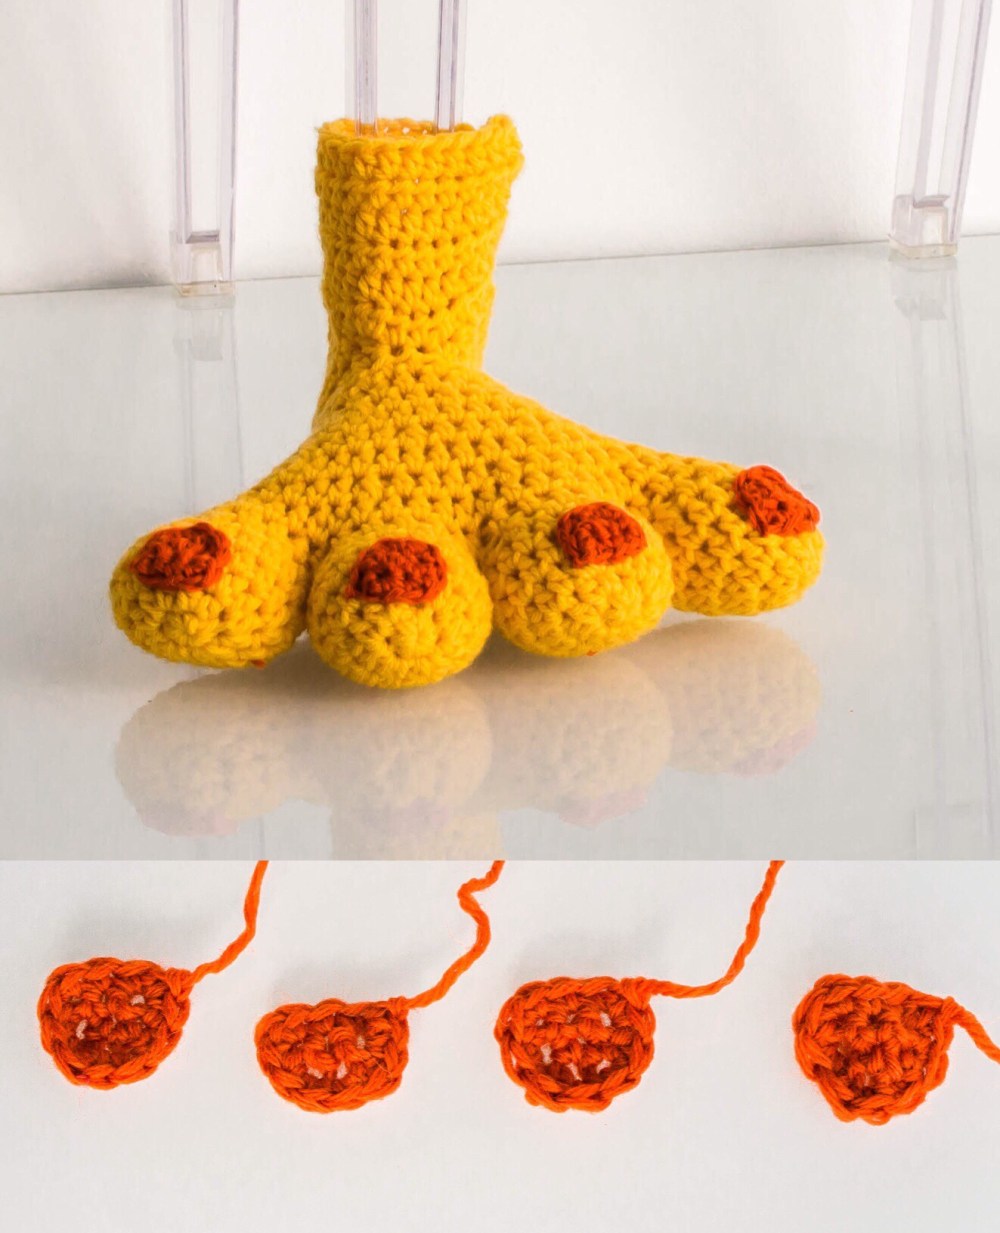
Claws & Toenails
The pattern is pretty straightforward this week. You’ve learned all the skills needed for these embellishments elsewhere.
A couple tips for shaping and placement.
Claws should be very lightly stuffed to maintain their shape. It’s easy to overdo it and get a sausage-looking claw. An unstuffed claw may actually look pointier than an overstuffed one. You can also pull and prod your “cone” into shape a bit. Play around with where you sew them to the toes. Maybe a little higher for a bear claw look. Or at wacky angles for a monster-y look. You can even angle them by sewing one side a row into the claw so it points that direction.
Toenails should be rounded on one side and flat on the other. The flat side is the tip of the toe, and the round side is the “cuticle”. The last round makes a nice finished edge. To maintain this while sewing it on, thread the yarn just “below” the front and back loop of that last round. Watch our live video for clarification here.
Welcome to Week 4 of the Monster Feet Yarn Bomb Along!
This week we crochet the Leg section of the pattern. It’s pretty quick work, so we’ll spend some of this post sharing your stories from the past three weeks. Next week we’ll add optional claws or toenails.
Remember, it’s never too late to join in! Go at your own pace, fast or slow.All the resources will remain on the web! Each week is listed at the top and bottom of each post for quick reference.
Our forum is full of amazing crocheters!
Wow, we’re amazed at what a phenomenally experienced group of yarn bombers and crocheters are hanging out in the MFYBAL forum! We wanted to point this out because the forum is poised to be an excellent resource. If you have a favorite yarn bomb, there’s a good chance the person who made it is in the forum. So go wild and ask all those questions you’ve always wondered about. What are your fears about the upcoming installation? Do you have any tips for people who are doing their first yarn bomb? Nothing is off topic!
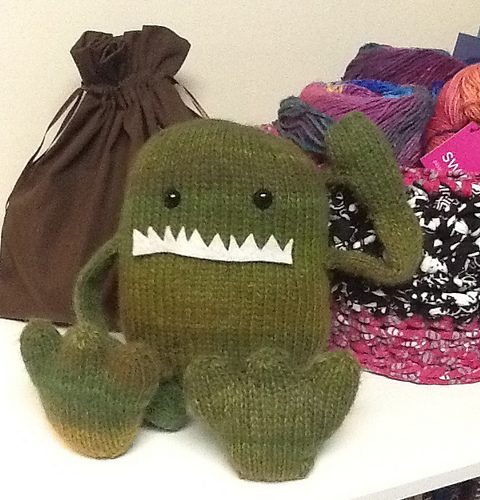
Here’s some past work by the talented members of our forum.
Installations are happening!
As we are starting to see monster feet in the wild, we wanted to give some shout outs to the interesting locations and stories you shared in the forums and on social media so far. Remember you are not behind! The purpose of our sharing these is not to stress you out or make you feel behind. Rather, it’s to provide you with some interesting tips and stories to mull over as we approach the final week’s installation. Go at your own pace and keep sharing your stories!
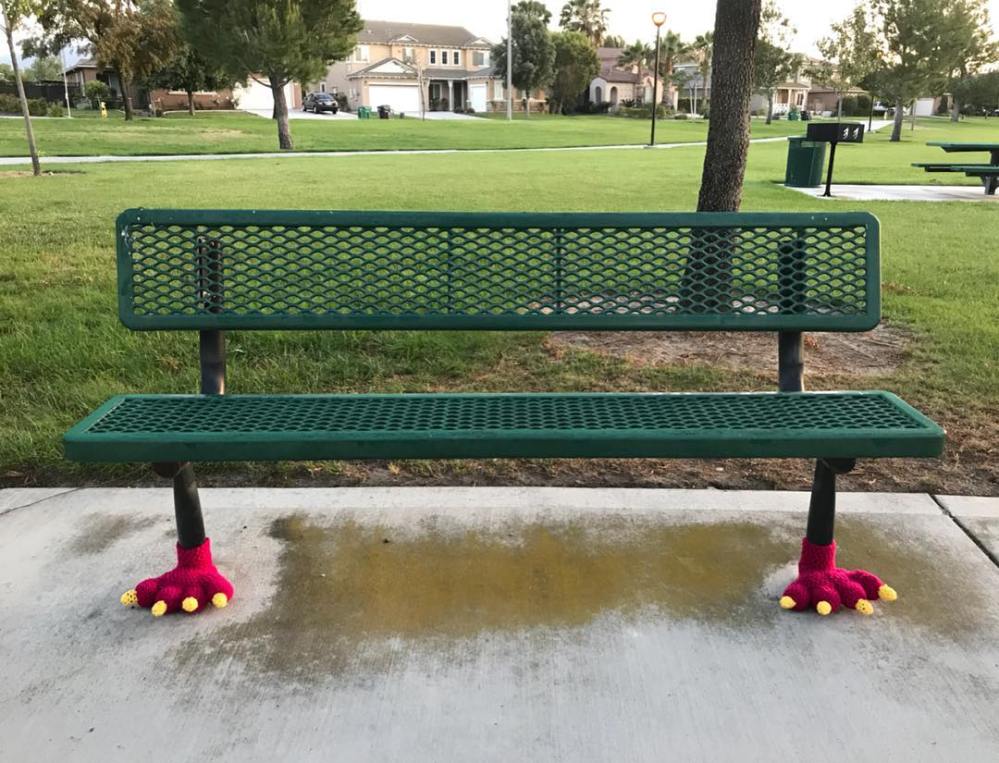
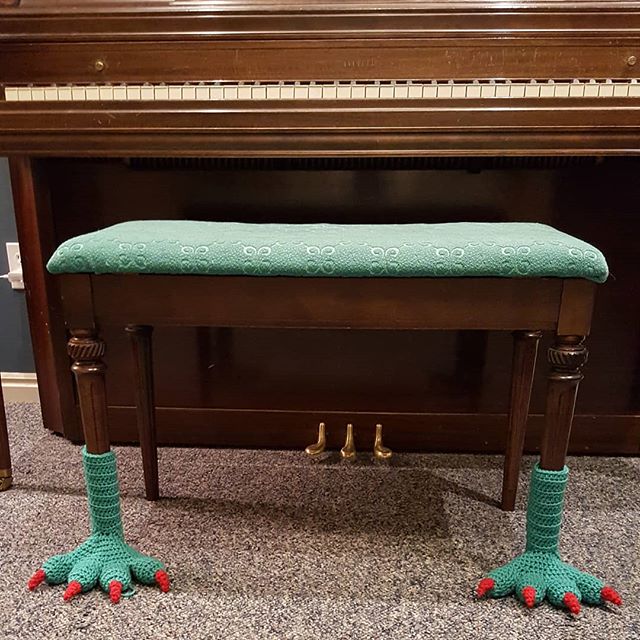
Pyganies found the world’s funniest bench for a pair of Monster Feet on her school campus. Someone was sitting on it waiting for the bus, but she wasn’t deterred. We are giving Pyganies a virtual Ounce of Preparation badge (ʘ‿ʘ)ノ✿ for putting a separate needle and thread on each foot so she could install as fast as possible!
Pyganies came prepared for a flash installation on the worlds best bench for feet.
A Green Toe badge (ʘ‿ʘ)ノ✿goes out to rckh2o in rural Nebraska for getting her feet wet with yarn bombing. Because her small town lacks anonymity, she’s starting her journey toward becoming the crazy yarn bomb lady with monster feet in her own back yard garden. We think this is a great idea! Like we’ve said, Lorna over here is secretly a selfish yarn bomber and loves to put pieces near home.
rckh2o seems to be continuing a tradition of stashing monsters around the house…
If you’re still on the fence about where to put your monster feet, take a tip from Naomi. “I’m nervous about stepping out of my comfort zone… and attempt FEET aarrgh. But I know the local kids will LOVE them.” What did Naomi do with her nerves and monster feet? She secretly installed her first pair outside a friend’s office as a surprise! One is Silver and the Other’s Gold badge (ʘ‿ʘ)ノ✿for Naomi. Now she says she’s hooked and is already hooking up some jumbo feet by holding the yarn double and using a jumbo hook. Can’t wait to see how they come out!
Naomi dealt with her nerves by planting the feet near a friend’s place as a surprise.
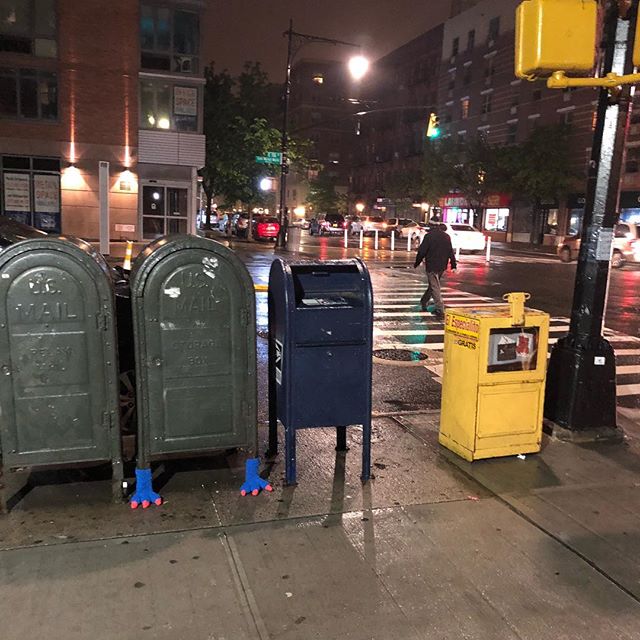
We love this “screech” of the record needle Lorri did upon seeing a sad bench in need of some love. “These monster feet were originally going to grace a USPS mailbox but the… bus stop looked so sad, that it got covered first. A regular rider waiting for his ride proclaimed them ‘Dope!'” Toes on Fleek badge (ʘ‿ʘ)ノ✿ for the custom tag! It looks like this was a difficult spot to sew in and we also are dying to know if the feet stretched to fit or did you adjust them for the bench?
Lorri went rogue and repurposed feet she made for a mailbox after seeing this sad-looking bench.
Alex has a warning for us all: double check your bag and checklist before heading out to yarn bomb. On his way home from work he planned to install his first pair of feet, only to realize one was missing. Gah! He had to wait all night to see if he left it at work or dropped it and lost it forever. Fortunately it was hiding under a table at work, yay! Gonna hand Alex’s this chocolatey Butterfingers badge (ʘ‿ʘ)ノ✿.
Alex’s three-toed variation in East Harlem.
Ok, last fun story. Jen has yarn bombed lots, but told us it’s with growing trepidation since several of her pieces have gone missing. For MFYBAL she asked the library if she could do the bike rack. Great idea! The more work you put into something, the more you risk by installing it guerrilla style. Getting permission not only can help your nerves but provide some reassurance it won’t go missing. In our experience, yarn bombing overwhelmingly leads to more positive things. And it did! “Amazing news. Library loves the idea. So much so they want to do a program around it!! I’m so excited. Thanks for the support guys.” Jen is saving the library for a bigger project since the risk is reduced. Smart Cookie badge (ʘ‿ʘ)ノ✿right there. We can’t wait to see where she puts her monster feet.
Hop on over to the MFYBAL forum and let us know how it’s going for you.
Week 3 recap
Before we get crocheting, we wanted to give a shout out to all the people who shared their week 3 progress. You guys are killing us with how much fun you’re having over on Instagram with these #mfybal posts and stories. Keep them coming, and remember to follow each other too!
Week 4: the Leg Section
OK let’s get down to business with this week’s crocheting.
If you’ve always made crochet stitches in the top of the row below, you’re about to go crazy and try something new! Crocheting is so sculptural and permissive. You can put the next stitch anywhere you want, really. So let’s do it! Check out the video tutorial above or follow along here with the photos.
Notice how your flaps from last week are splayed out to the sides to wrap around the pole. Now we need to build height with rows parallel to the ground. We’re just going to pretend our work so far is one big rectangle and keep going. Yep, we can totally do this: crochet lets you do whatever you want!
How many stitches are in this new row? It depends on how big around your pole is and how big your stitches are, so the pattern can’t say. Typically you’d make a swatch to determine your stitches per inch. But that’s a waste of time because we have two swatches right here in our flaps! If you get lost with swatching, the pattern has distilled it to the essentials for you. Just plug in the numbers and you get the number of stitches in the leg rows.
Number of stitches in leg row = (circumference of the pole / width of the flap row) x 12. We got 20.
Notice in the photo below that one row is worked across the top of entire piece. To evenly space the stitches, it helps to mentally divide your work into quarters. Put one quarter of the stitches in half of one flap, and so on.
What if my pole isn’t straight?
Bethhad this question in the forum because she’s doing a tapered chair leg. Since this is a small project and we don’t need to worry about wasting yarn, just make the flaps and leg to the largest circumference. When you install you can overlap the narrow areas to get a tailored fit.
So, keep crocheting until you reach your measured height and this project is almost done!
Next week we’ll be back for the toenails and claws. We look forward to seeing what you’re up to this week!
We hope you’ve been able to introduce yourself in the group forum and are ready with your pattern, materials, and measurements. It’s great to read your introductions and chats–keep them coming! We had fun following you back and checking out your social media feeds. Some of you’ve done some pretty sweet yarn bombing.
Remember, you can do everything in this yarn-bomb-along at your own pace. Simply follow along with the weekly posts as you come to the next step (linked at the top and bottom of every week’s page for reference). If you are ready to start the pattern but aren’t quite sure where you’ll put your monster feet yet, you can still crochet the toes this week. Next week we will use the measurements.
Beginners, did you get a chance to brush up on your skills? We posted a thread in the group forum for beginners’ resources. Feel free to check out the resources there and post anything else you find useful. Since the monster feet pattern is for advanced beginners, we’ll jump right into it this week and assume you know the basics of crochet.
Crochet warmup
It’s always a good idea to read through a pattern from the beginning. At the very least, be sure to read over the stitches and techniques used. Check that you’re familiar with the standard US terms and abbreviations we’re using at the end of the pattern.
The Craft Yarn Council is a great resource for needle arts at all levels. Here are some helpful resources:
As we work through the toes in our video below, we’ll show you how to half double crochet (hdc), then how to increase (inc) and decrease (dec) using hdc. Remember to use the internet! Anytime you need help with a term, search YouTube with the term plus the word crochet and look for a video that works for you. Or, post your question in the forum and we’ll help you out.
Making the toes
Each toe is a partial sphere that’s crocheted in the round as a spiral. You can find many ways to begin crocheting in the round and a million tutorials on YouTube. We like to start crocheting in the round with a magic ring (also called a magic loop, magic circle, adjustable loop). Use your preferred method; the important thing is to use a method that creates a tight ring so there’s no hole where stuffing can poke out. Here is a simple magic ring photo-tutorial Jill made for her favorite way to do it.
Once you’ve got your magic ring, follow along with this week’s video tutorial below. After a short recap of week 1, we crochet a toe together, explaining all the stitches involved along with a few pointers. Both newbies and experts can sit back and make a toe along with us.
See you online!
Remember to post your projects and questions in the forum and online using #MFYBAL. We’d love to hear, why do you like to yarn bomb? If this is your first one, what made you interested?
Washington, D.C. Lyft riders will see a new app option during the 2017 holiday season: Merry Mode. Tap it and a Lyft car in an ugly Christmas sweater that we helped crochet arrives complete with karaoke carols inside. Read more about it here. Lyft donates its share of each Merry Mode fare to local nonprofit Martha’s Table.
Lyft’s Merry Mode is live in Washington, D.C. at the following times:
Throughout summer 2017 we’ll be knitting in the newly named Civic Center Commons in San Francisco, California. The Trust for Public Land is unveiling several new projects to make the three blocks it spans more lovable: Civic Center Plaza, Fulton Street, and UN Plaza. One of these projects is yarn bombing over 100 trees to visually connect the space with a tangible art installation that invites the community to connect with the space.
You can take part in a bunch of ways!
Lunchtime knitting machine demos: Come watch us demo the knitting machine we used to knit the commons on Tuesdays and Wednesdays in June. Full schedule: June 13-14 on Fulton Street; June 20-21 in UN Plaza; June 27-28 in Civic Center Plaza.
Watch us install the first batch of yarn bombs throughout the Commons June 12-29, 11a-3p.
Design next batch of trees with us! The first batch literally knits the new Civic Center Commons logo colors through the trees to visually link the three plazas together. The second batch is up to you! Vote on 3 designs we’ve proposed or dream one up yourself.
Visit The Commons with your community group! If you haven’t been lately, there’s so much to see! Throughout the week there is so much else to see too: a pop-up playground, Off the Grid, farmer’s market, street market, Exploratorium pop-up exhibits, and cute tables and chairs with Tivoli lighting!
Be sure to tag us @KnitsForLife in your pics so we can enjoy them and use the hashtag #KnittingTheCommons.
The question we most commonly got about our Buttmunches, the yarn bombed monster benches we did at San Francisco’s Ferry Building, was: Can I have one? So we said yes! Each meticulously handmade Buttmunch chair exhibited at Unleashed Art Gallery over the summer. The green chair is still available in the shop here. Contact us for a viewing at Claremont Art Studios or to discuss your idea for custom kids furniture or whimsical decor.
Despite much tension between art and tech in pricey Silicon Valley, an interesting symbiosis is also happening. Young professionals appreciate the art, especially street art, just as they appreciate good food, coffee, and barbering. The tech companies they build enact these values, engaging local artists to inspire their workforce.
“It’s a visual and a physical manifestation of what’s happening on the computers,” Bennett says. “You could just present your values on a piece of paper. But inviting a diverse group of independent artists to work alongside us is a more genuine expression of that creative process.” – Drew Bennett, artist.
We thrive on this symbiosis. As Bay Area natives, innovation and creation are inherent in us. Producing live installation art, knit props for events and advertising, and yarn bombed corporate art is our Silicon Valley version of Hollywood production. Ever since our childhood fantasies of conjuring characters in Jim Henson’s Creature Shop, we’ve always wanted to make new things with a team from one project to the next. What a ride!
We love inspiring people to make the world a sillier place. Last week we saw so many monster benches and monster feet on Instagram that we decided it’s time to bring a fun, new transformative concept to life. To brainstorm, we headed to an auspicious place to get our gears spinning: the park directly adjacent to the home of the original Maker Faire: Bay Meadows Park. A new park in a windy spot, all the trees are young with support poles. At first glance, this could pose a problem to the imagination, without any grand shapes in which to envision giant squid and palm trees. Instead of being deterred we embraced those skinny little trios of poles dotting the field. Within minutes, one cute, leafy tree top in particular sparked our make-believe session with visions of vegetables traipsing across the field. A few measurements later, and off to the studio we went to bring him to life. As always, here we post a bit of our process to inform your own yarn bombs. You’ll notice we’ve begun documenting the process with Snapchat. Follow our story to see what we get up to and show us your work too! (more…)


You must be logged in to post a comment.