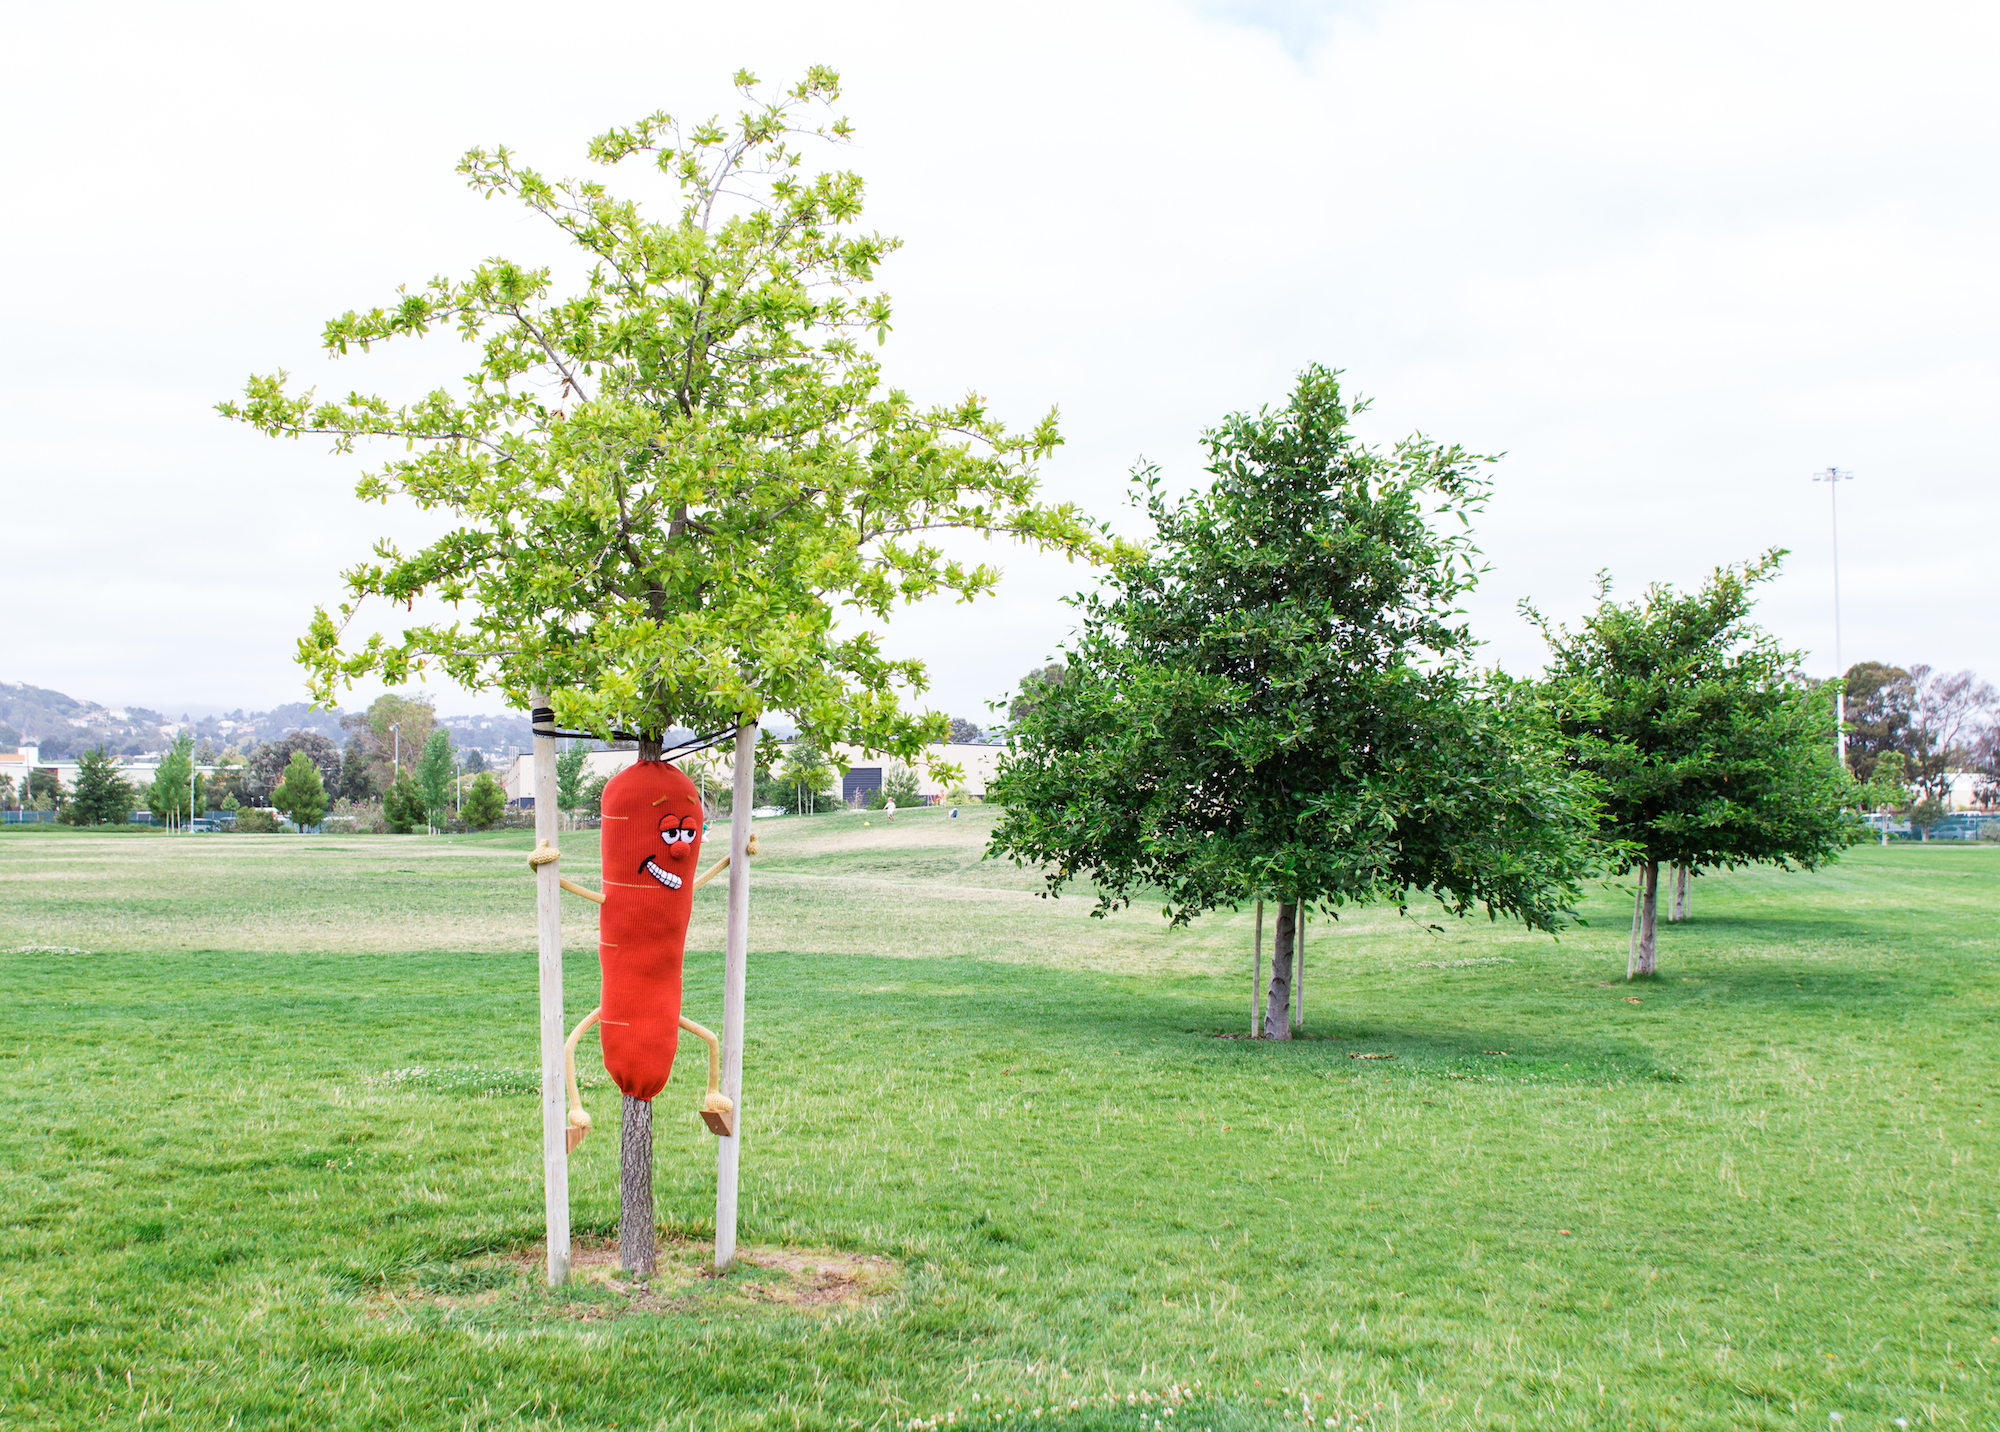
We love inspiring people to make the world a sillier place. Last week we saw so many monster benches and monster feet on Instagram that we decided it’s time to bring a fun, new transformative concept to life. To brainstorm, we headed to an auspicious place to get our gears spinning: the park directly adjacent to the home of the original Maker Faire: Bay Meadows Park. A new park in a windy spot, all the trees are young with support poles. At first glance, this could pose a problem to the imagination, without any grand shapes in which to envision giant squid and palm trees. Instead of being deterred we embraced those skinny little trios of poles dotting the field. Within minutes, one cute, leafy tree top in particular sparked our make-believe session with visions of vegetables traipsing across the field. A few measurements later, and off to the studio we went to bring him to life. As always, here we post a bit of our process to inform your own yarn bombs. You’ll notice we’ve begun documenting the process with Snapchat. Follow our story to see what we get up to and show us your work too!


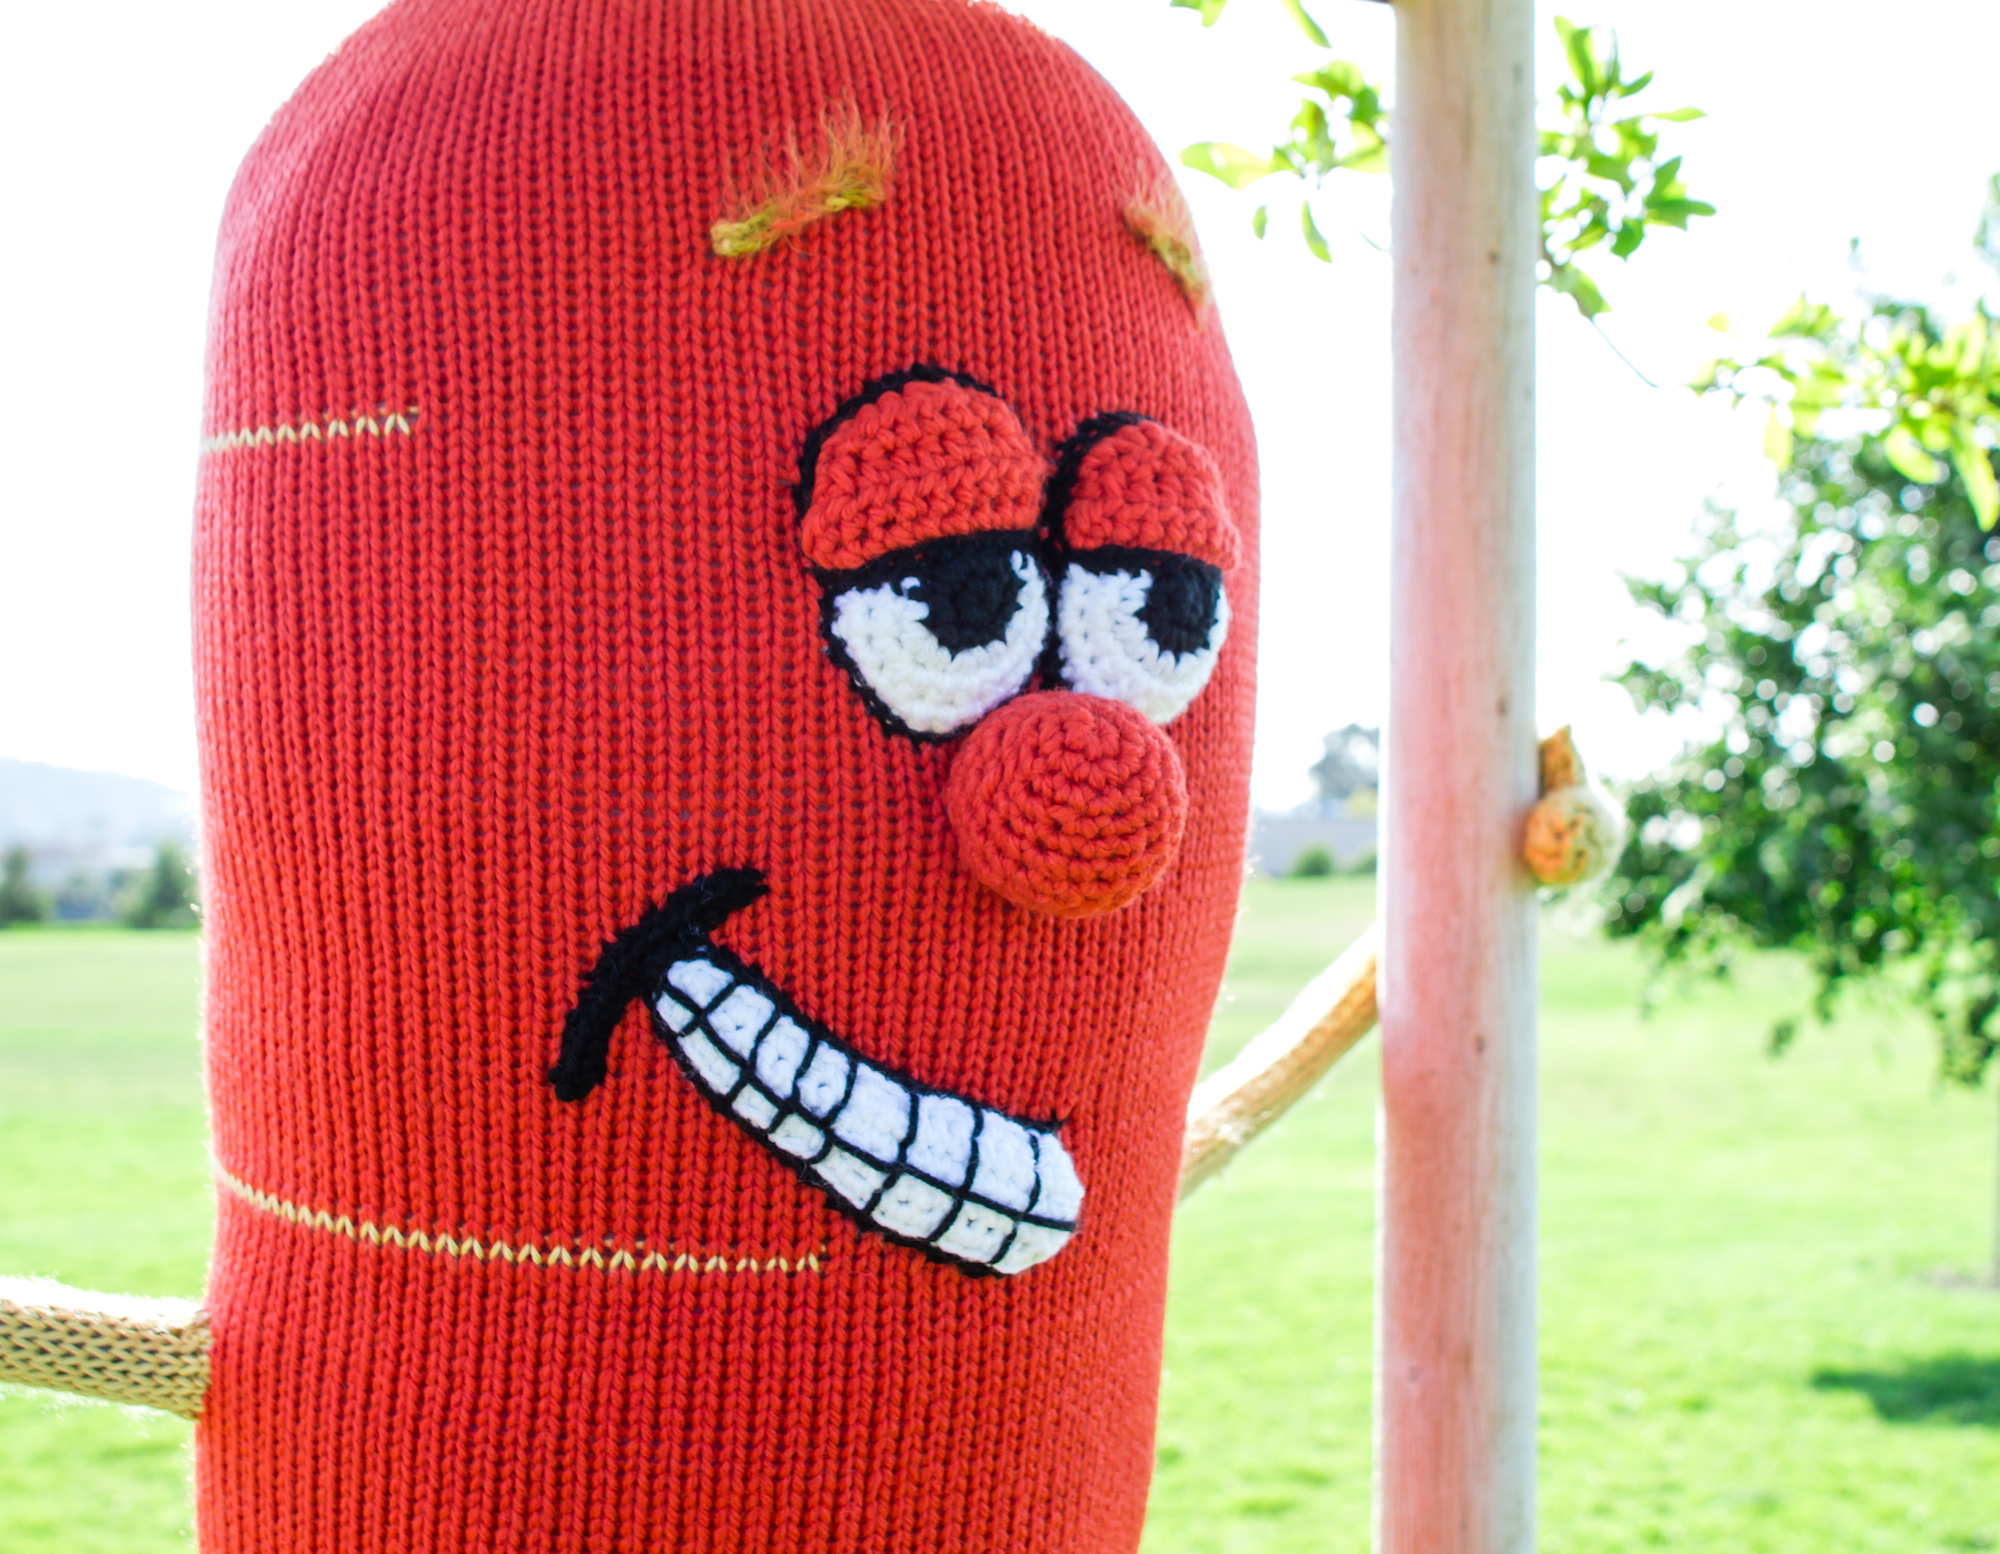
We always say it: use the best tool for the job. In this case, that meant hand-looming the large, flat body and limbs on our bulky gauge Brother KH-270 knitting machine and hand-crocheting the more sculptural details. Swapping in gold yarn for a partial row every few dozen rows created some realism. Instead of calculating body shaping, we just used a rectangle and achieved shaping with seaming and stuffing. This wastes a bit of yarn, but we usually work with value acrylic so it’s a small cost. In this case, we were mainly working with some donated vintage yarn from JC Penny with the original price tags from the eighties. Who could have guessed where it would end up 30 years later! We carried the gold into the arms and legs, then went wild on the eyebrows with some fuzzy novelty yarn Lorna picked up a decade ago in Germany. A true scrap buster!

A great yarn bombing trick is to cast on and bind off with a provisional edge. This threads your beginning and ending stitches onto a string you can later pull and cinch up to fit any object. Another trick is to use household objects or hardware for staging ideas as you go. Here we did a dress rehearsal on a rolled-up piece of plastic fencing in the studio.
It seems every yarn bomb presents a new problem that we solve by MacGyvering MacGrubering a material that’s new to us. For arms and legs, we wanted a soft, cartoonish look that would hold up over time. Stuffing would hold up for the body, but the arms and legs would surely stretch and droop like a saggy mess. For the Albino Python yarn bomb at Gensler SF, we discovered foam pipe insulation. This time, instead of stuffing it to get a thick snake we sliced it lengthwise to get skinny limbs, taping them up nice and round. Slits and more tape held knees at a good angle (and even survived the toddler test, we spied the next day in the park). The material that was new to us on this yarn bomb was wood and power tools for the stilt steps. We foraged for wood scraps at a local lumber yard, had a friend saw them into shape, and brought a cordless drill to install them. Super easy and they really complete the illusion.


Is there a spot you’re trying to brainstorm a new yarn bomb for? What materials have you tried? Let us know on Twitter or Instagram @KnitsForLife.
xxxo,


2 Comments
Comments are closed.