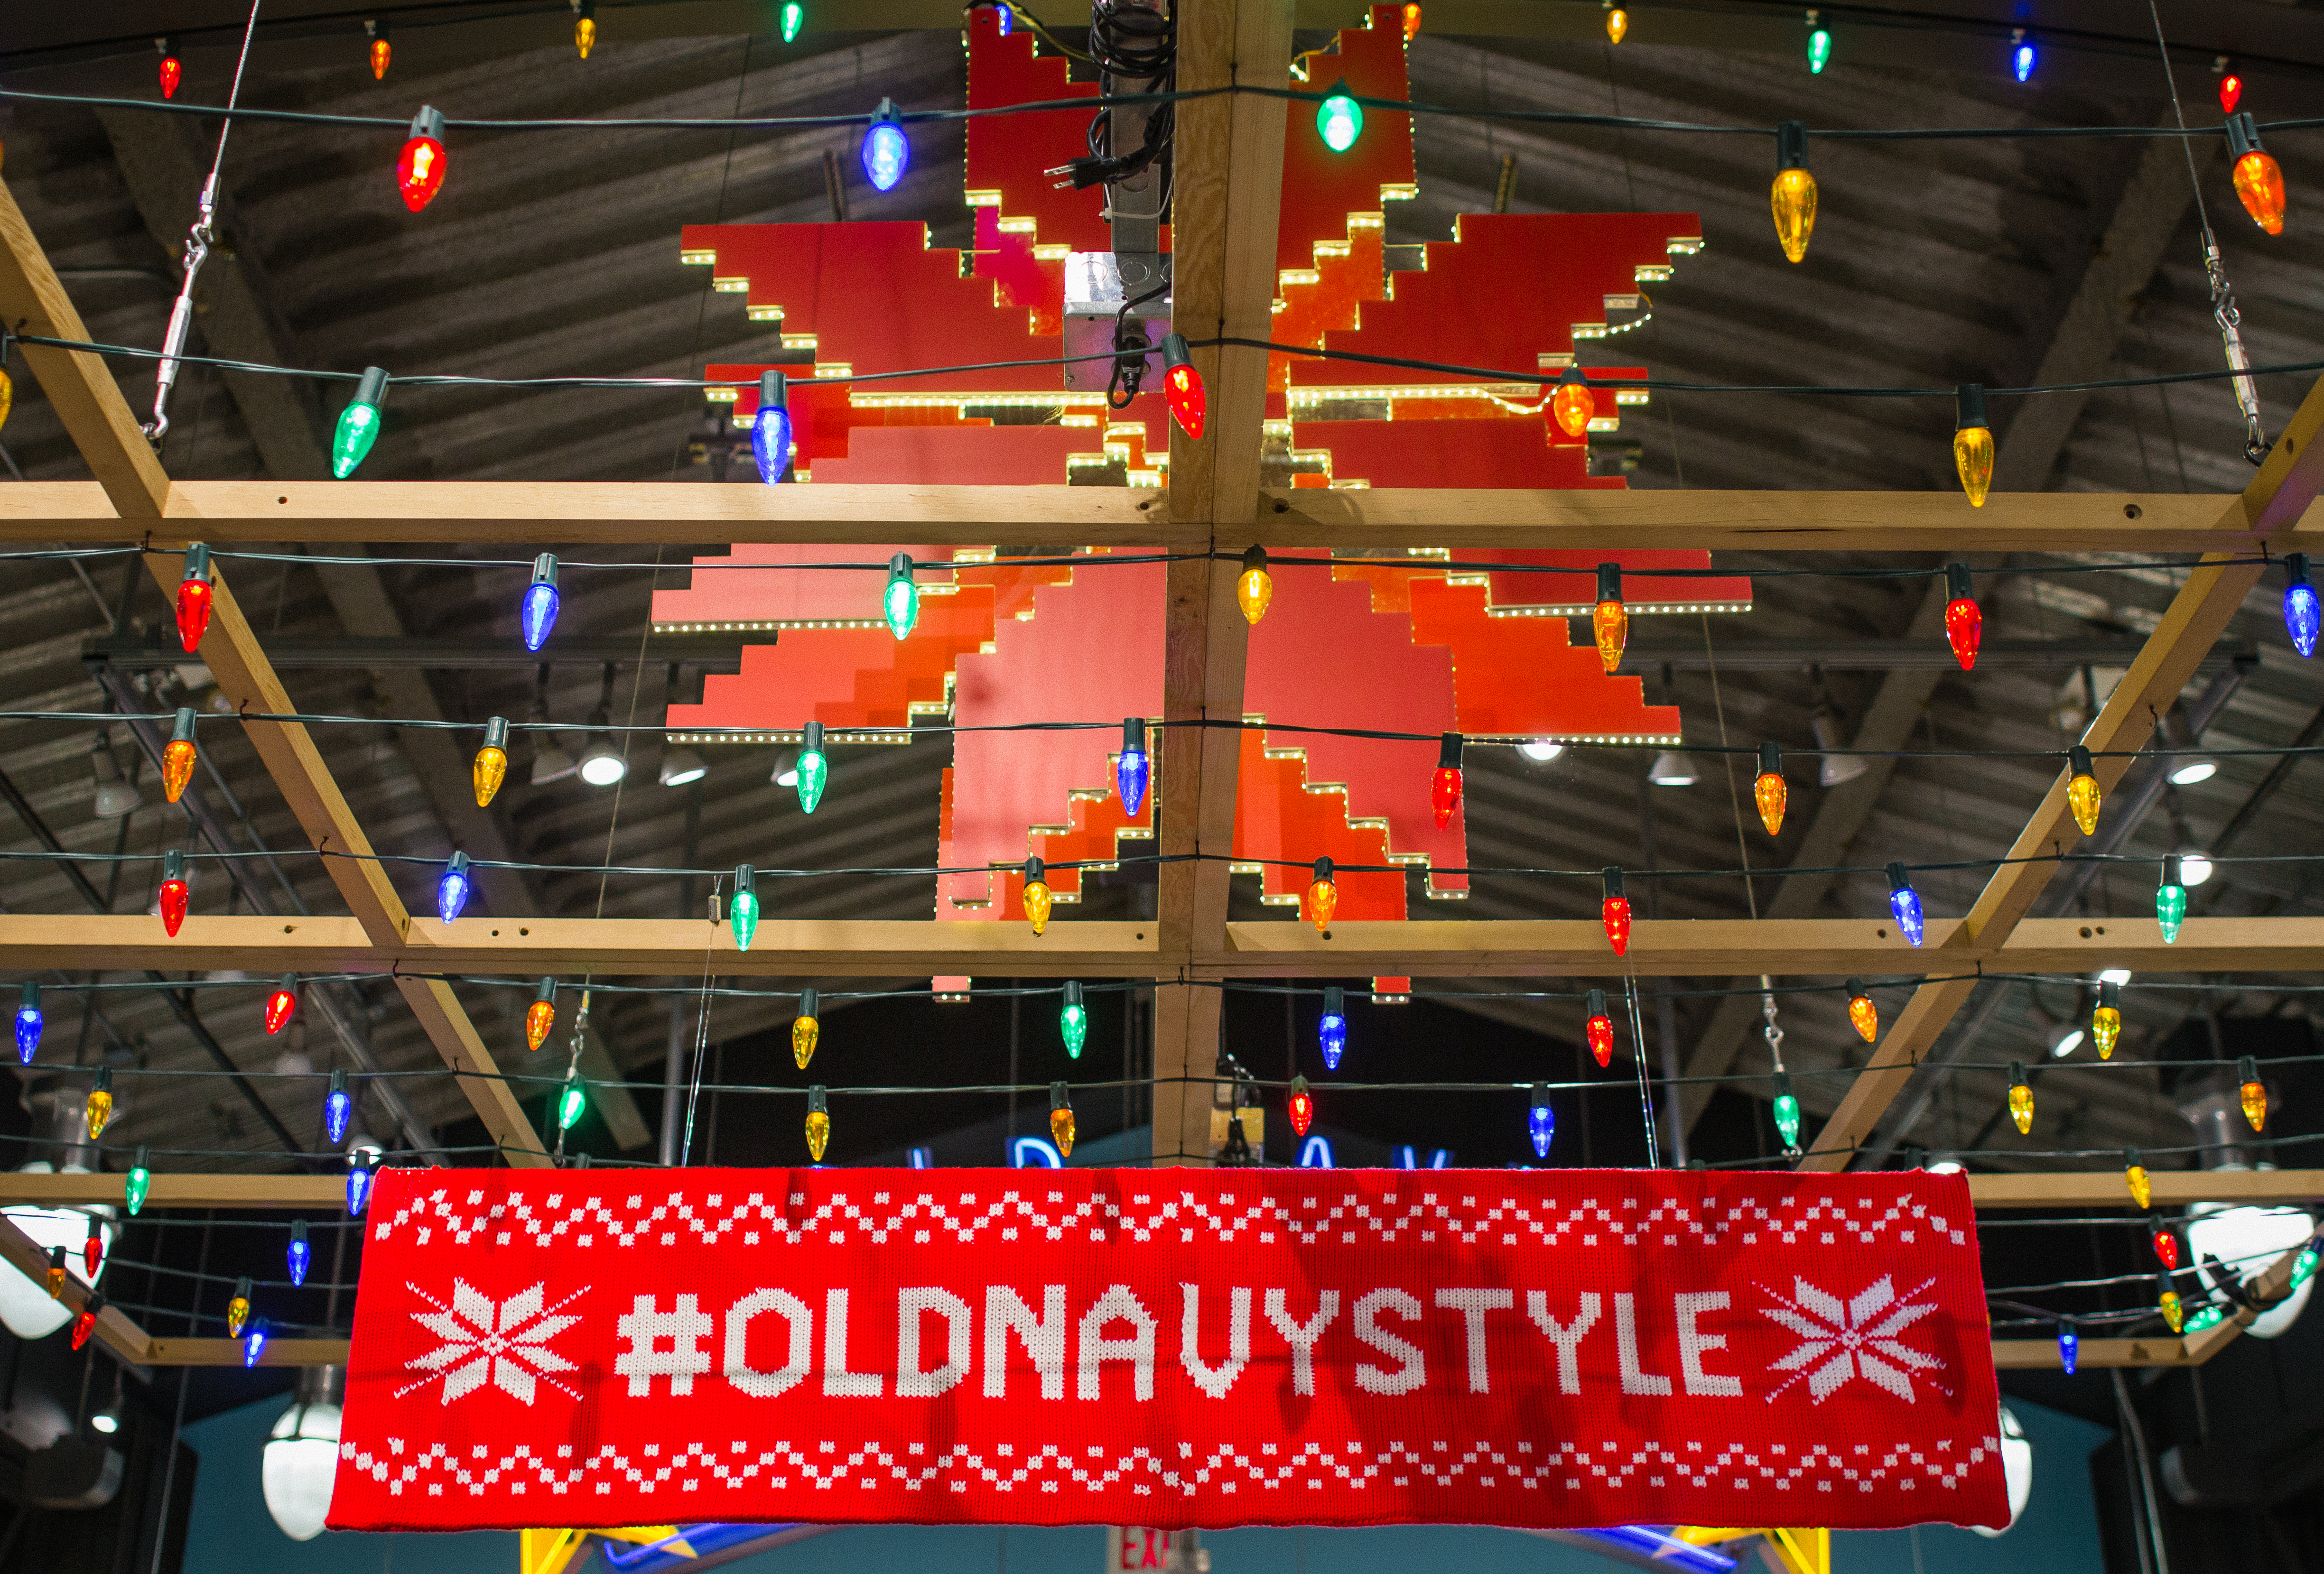
You’ve seen our epic yarnbomb of a 1950’s Chevy truck in Old Navy‘s San Francisco Flagship store (up til January 2015). Now get ready for the second epic yarnbomb: three yarnbombed bumper cars in Old Navy’s New York 34th St Flagship store.
How awesome is Old Navy to choose yarnbombing to celebrate #OldNavyStyle in a season full of fashionable knitwear for the people! We were so stoked that they asked us to do this second project on the same block with the Thanksgiving Day parade. It’s our little Miracle on 34th Street. Forget Santa’s lap–go snuggle your derrier into one of these vintage babies this Christmas. (And I know you want to but sorry, they don’t move around.) Be sure to tag us in your pics (@knitsforlife @thedappertoad @oldnavy) so we can see you!
For those of you who are interested in learning to step up your work to more ambitious yarnbombing projects, get your scroll on and I’ll tell you a bit about our process. It’s basically three steps: design, construction, and installation. But first, the pics!


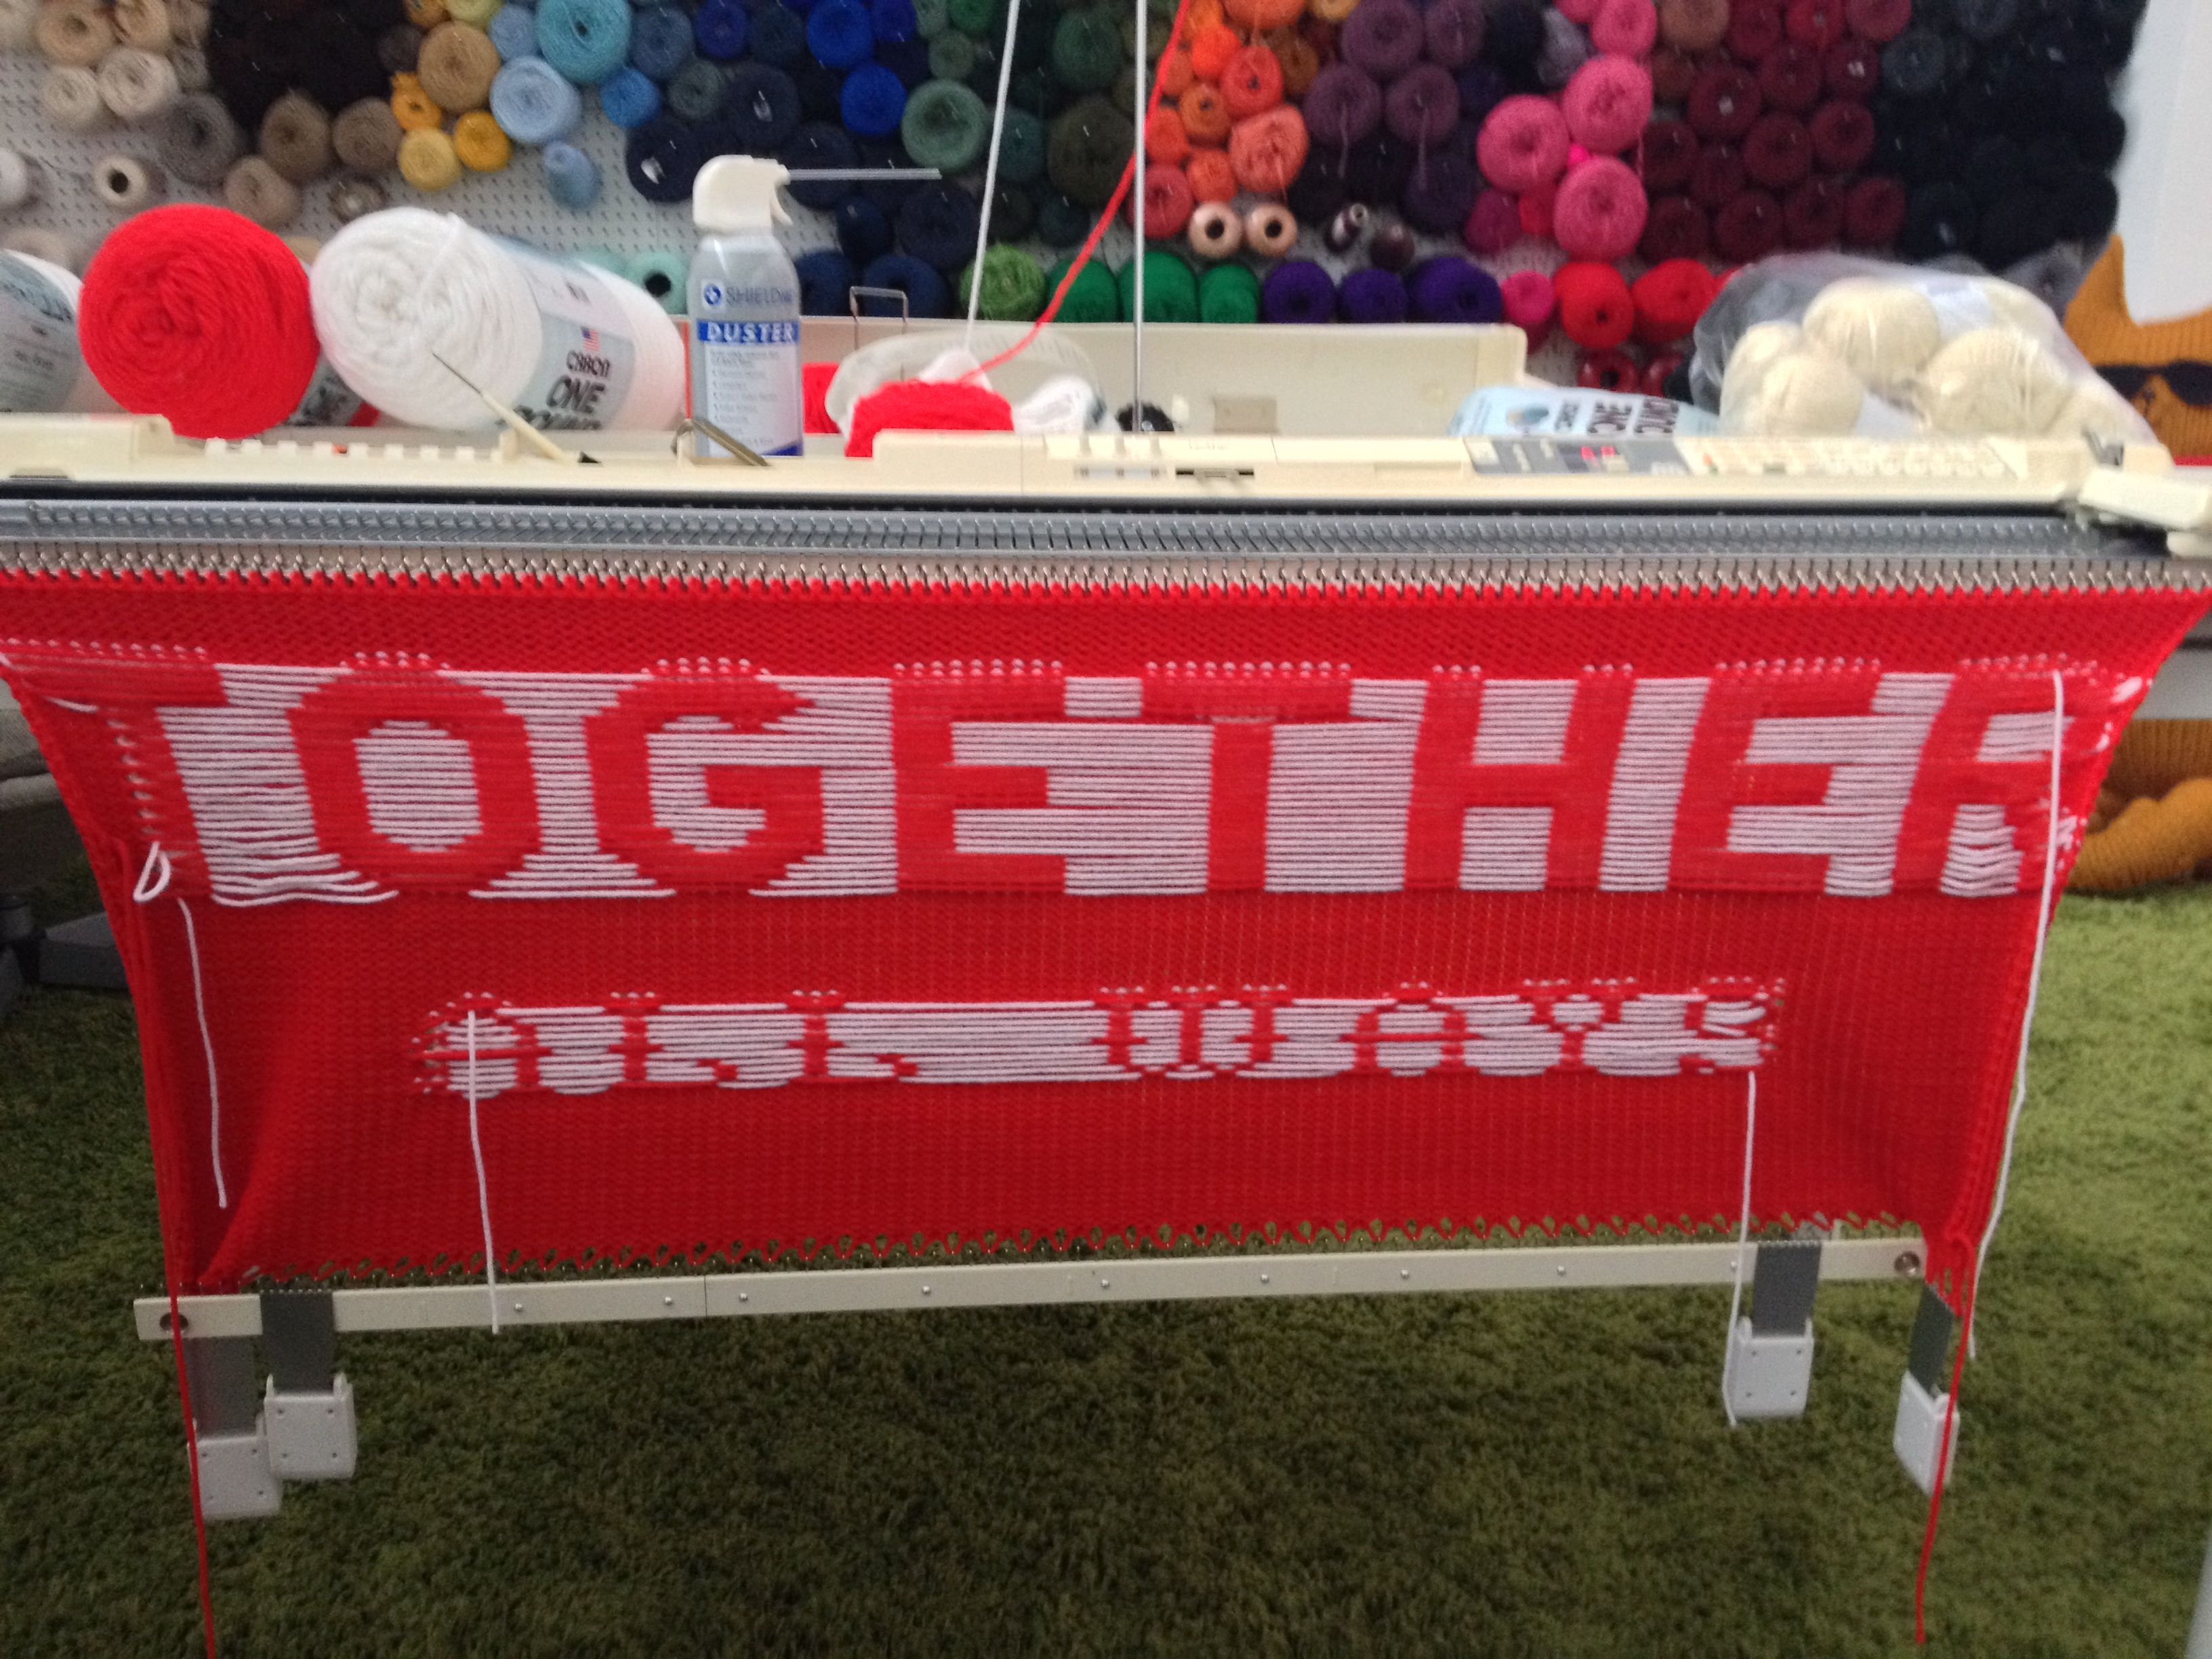
1. Design includes a sketch and engineering. Old Navy did the sketch and we translated it into knitting and did the engineering. You translate the colorwork elements in the sketch (snowflakes, letters, etc.) into charts. We input the charts into our Brother KH-270 knitting machine. While it sounds easy and is certainly faster than hand-knitting, it’s still quite a laborious process of mostly prep. Read more details about charting in this post.
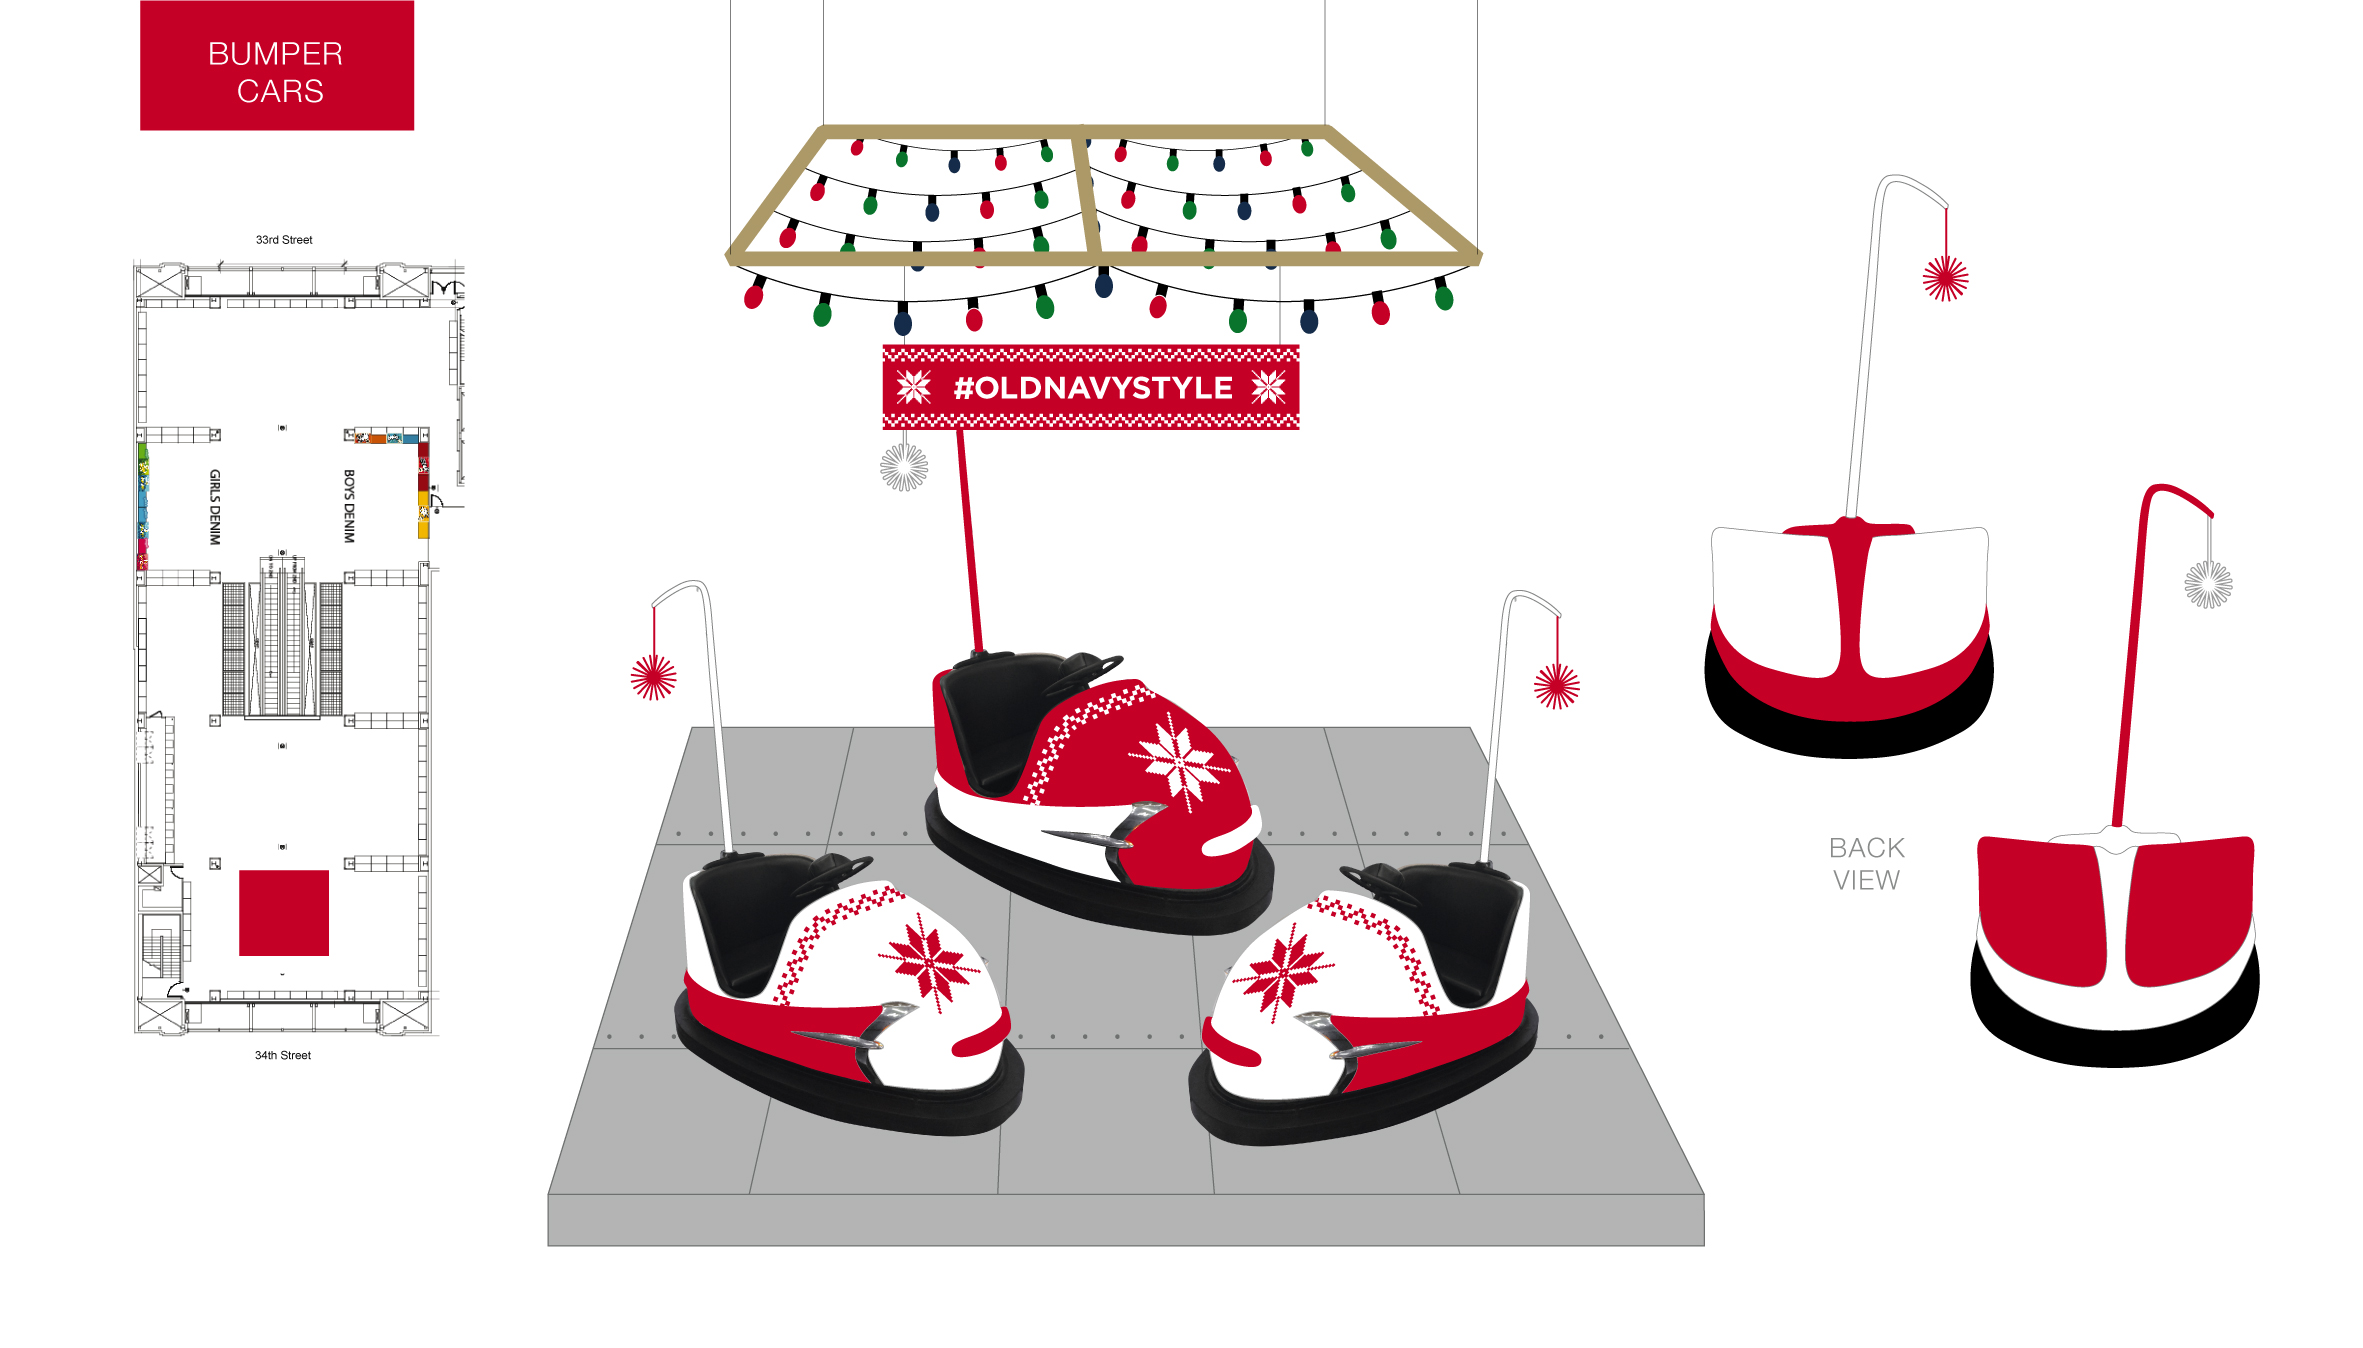
To engineer how you’ll construct the yarnbomb, you break down the overall design into panels to seam together. We conceived of a few ways to do it and chose the one with the best stitch alignment and seam location. One consideration is whether you’ll knit rectangular panels or custom shapes. We braved knitting rectangular ones to cut to shape on site. The fear of unraveling fabric is great within knitters, but a simple whip stitch around cut edges secured them nicely and we conquered in the end.
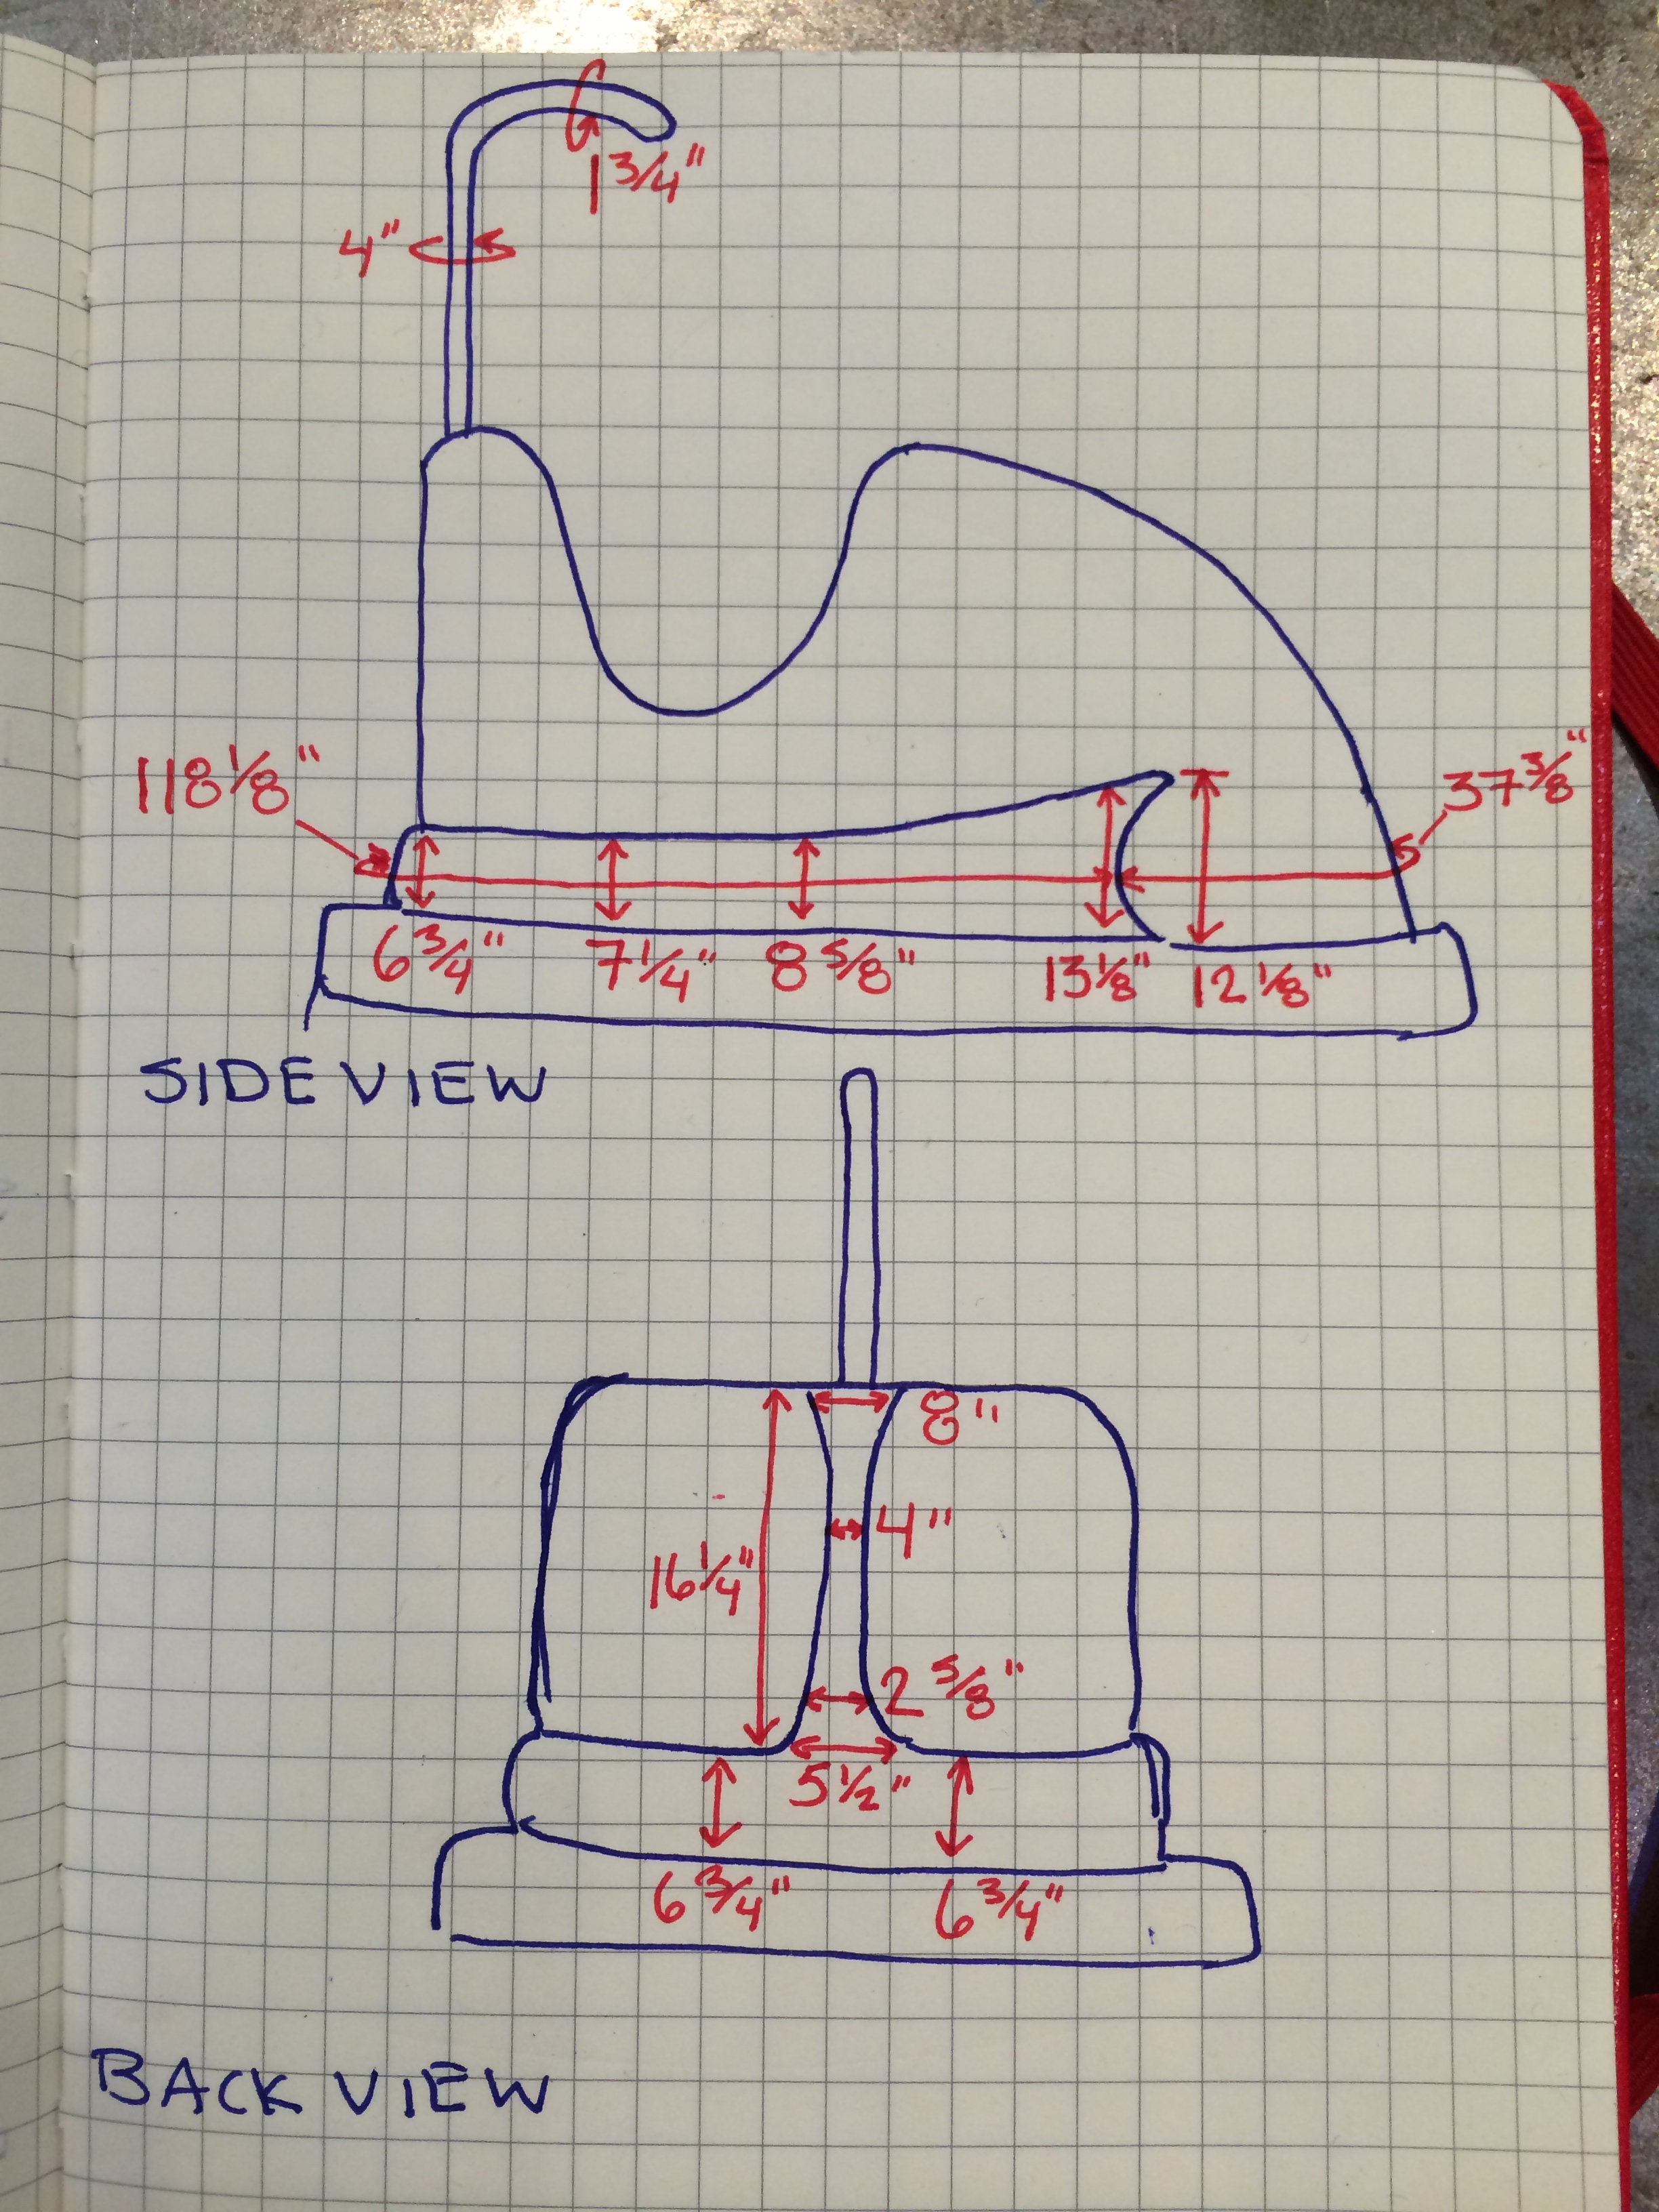
Once the panels are mapped out, you take measurements to get their dimensions. We did all our nail-biting over the fact that we didn’t fly out to take the measurements ourselves. Instead, Old Navy’s team sent tons of photos, we sent back diagrams of our required dimensions, and they took careful measurements. Since knitting is fairly forgiving, we could bring back-up panels, and we were on a 2-week timeline, we figured the risk was low enough that it would work out, and it did!
The final engineering step is to translate each panel’s dimensions to a stitch and row count based on a swatch of knitting in the same yarn, gauge, and tautness as the installation. Calculate thrice, knit once!
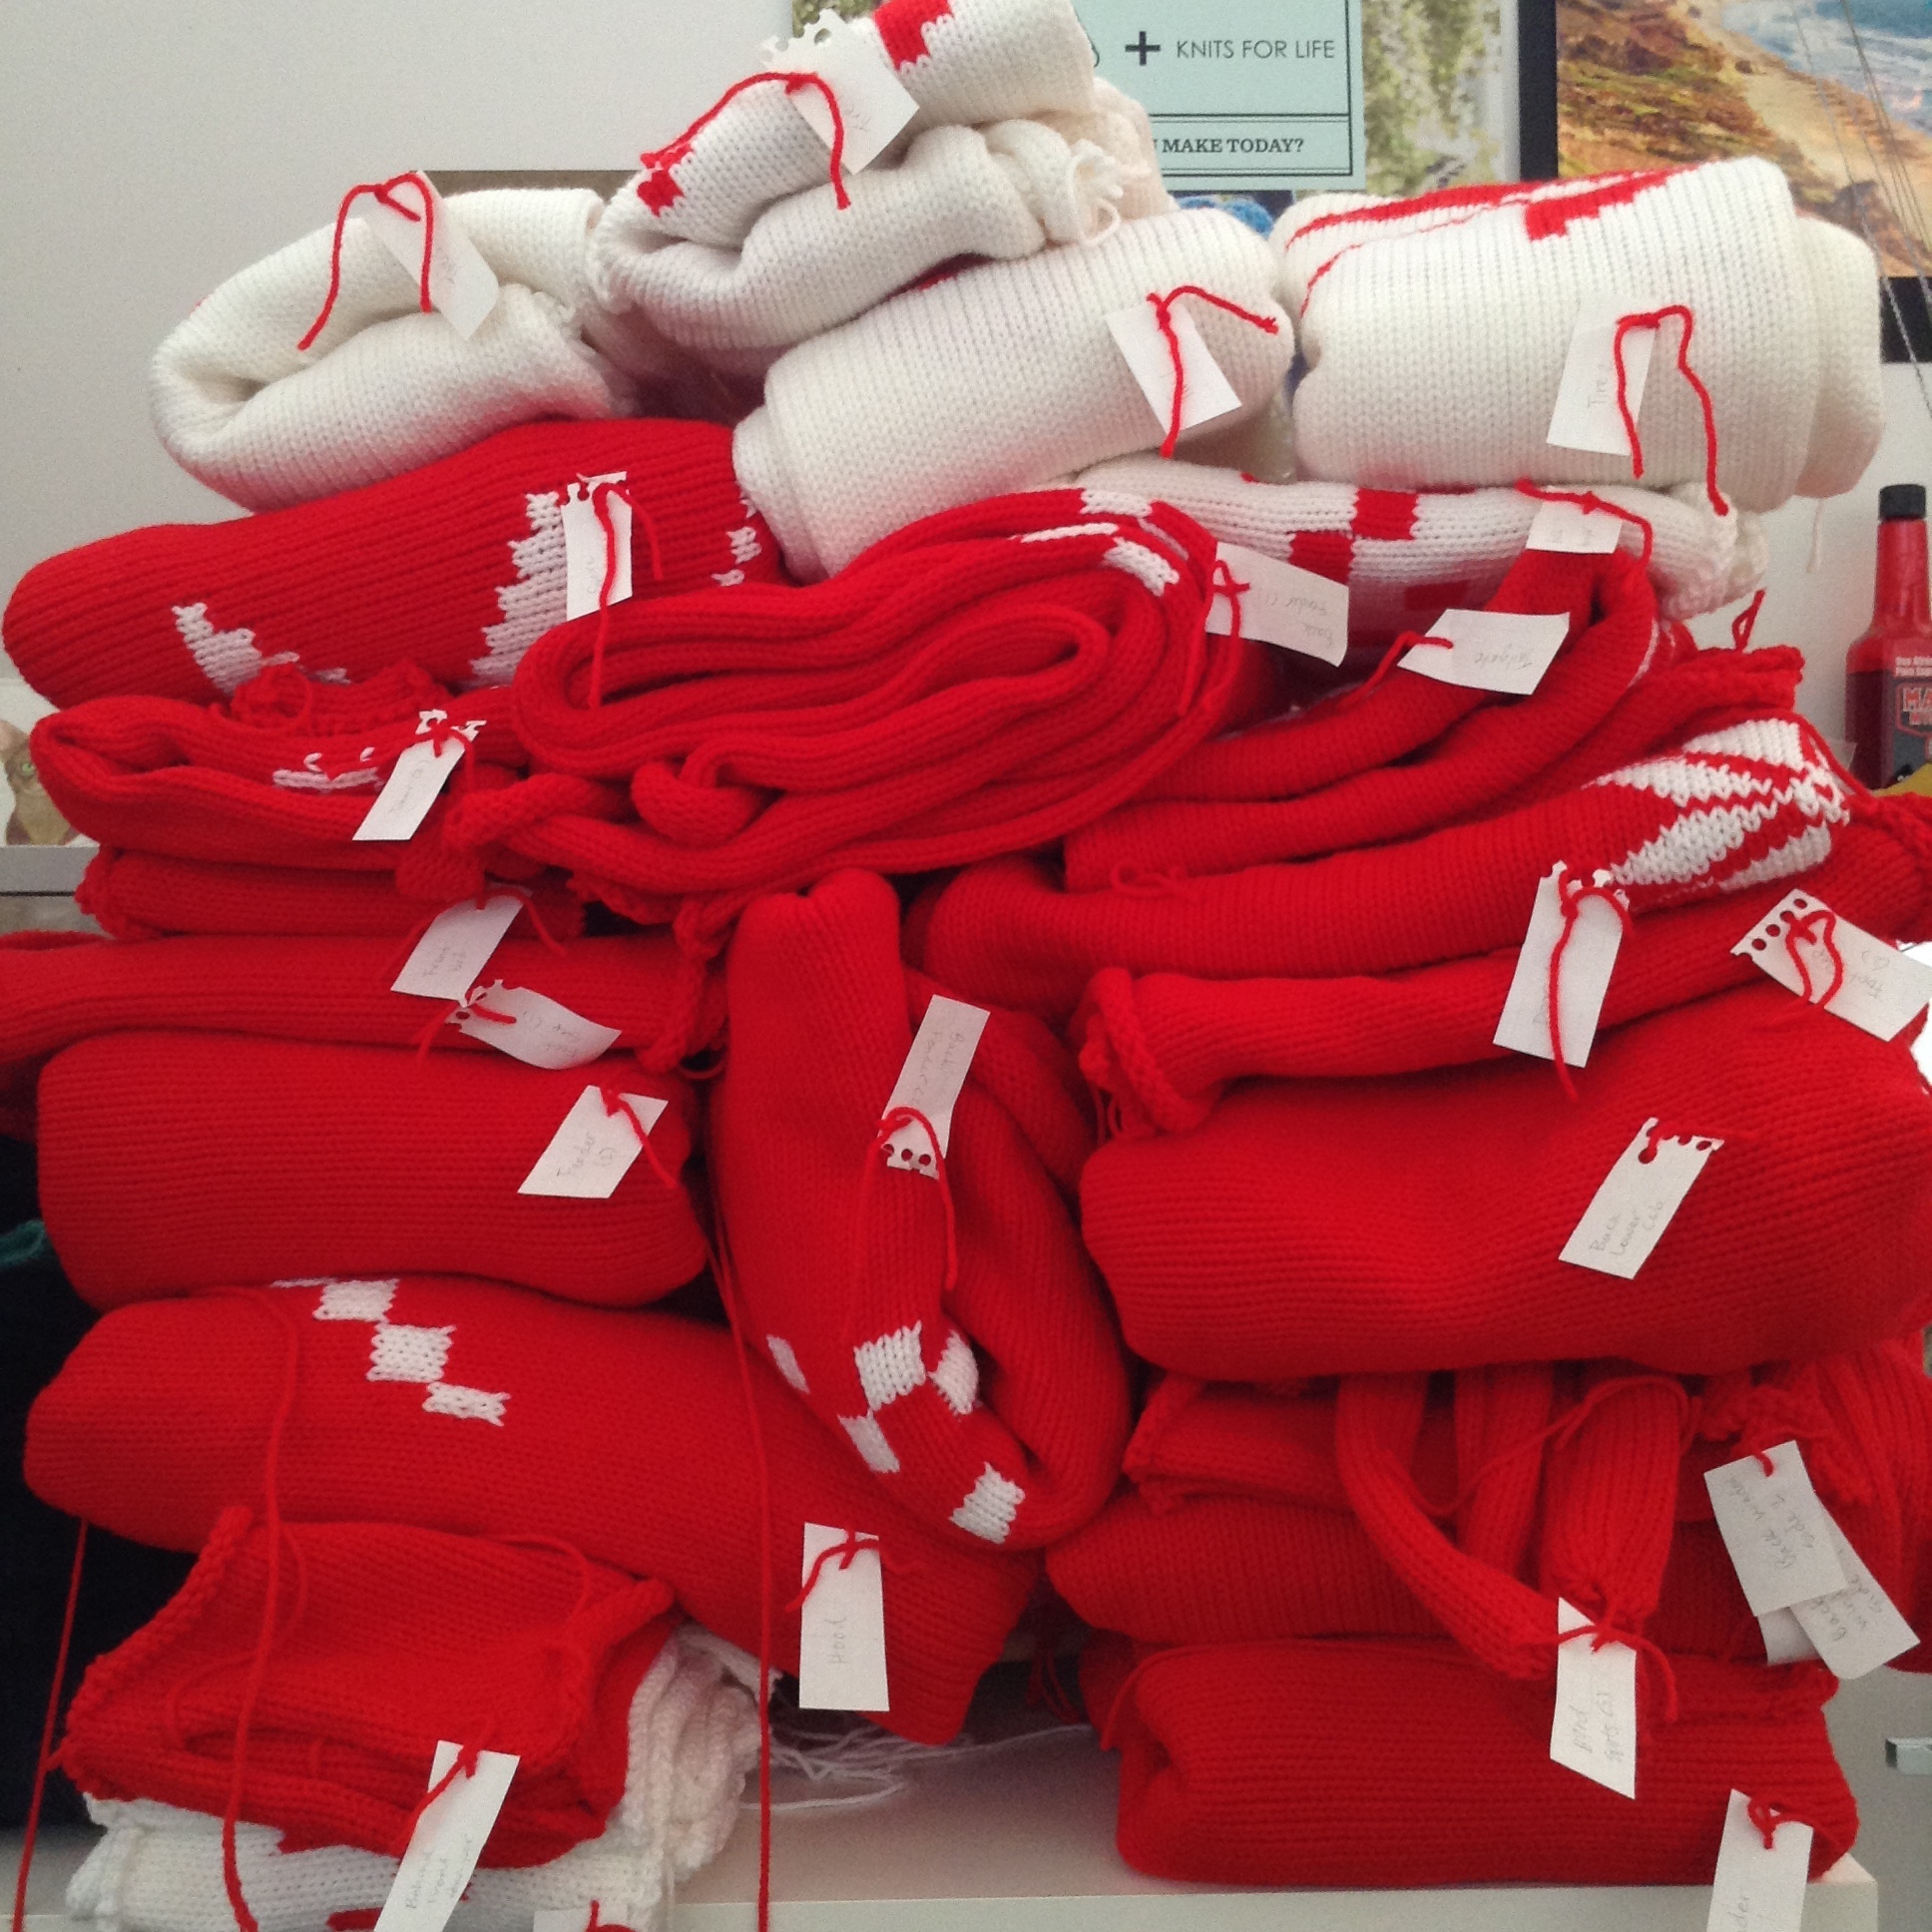
2. Construction, as every knitter knows, is the fun part. The Brother KH-270 knitting machine is like a cross between a circular knitting loom and a weaving loom. It has an input for the colorwork to tell the needles which color to select for each stitch, and a bed of needles over which you manually pass a carriage for each row. Each bumper car comprises 11 panels, so with the sign we had 34 panels to knit.
3. Installation is equal parts sewing and ingenuity. This step is also a huge consideration during the design stage. It seems every installation we do these days requires us to dream up a new installation technique. First there was the staple gun (no, it doesn’t hurt trees). Then there was fishing line and plastic canvas. Now we turned to decals, Velcro and hot glue. (Here’s a great deal on bulk Velcro tape.) First we applied a vinyl decal layer in places where the bumper car paint job might show through the knitting too much, muddling the color. Next we applied sticky-back hook Velcro tape around edges and center areas to hold the knit panels. Finally we hot glued around the borders a huge crochet chain, made on a jumbo 16 mm hook with yarn held triple. Sounds easy, but that’s a lot of layers for a lot of edging. Elsewhere the panels are mattress and Kitchener stitched together for the best-looking seams. Voila! It’s crazy that even though this project only used 1/4 as much yarn as the truck project, it took the same amount of time to install!


Technically, there’s a fourth step: sharing! We love photographing, posting, and tagging our work. But the best part about it is that we can see how much fun people have interacting with the #OldNavyStyle yarnbombs. Our friends in New York were the first to hop in for a ride!

Remember if you go see it to tag us in your pics so we can see you! (@knitsforlife @thedappertoad @oldnavy)
xxxo,
Lorna & Jill


A-FREAKING-MAZING Y’all!!!! OMGeeeeeee!!!
You guys do an incredibly creative job with your knitting machines. It’s a real joy to see what you’re up to.
Part of the Machine Knitting Guild of the San Francisco Bay Area